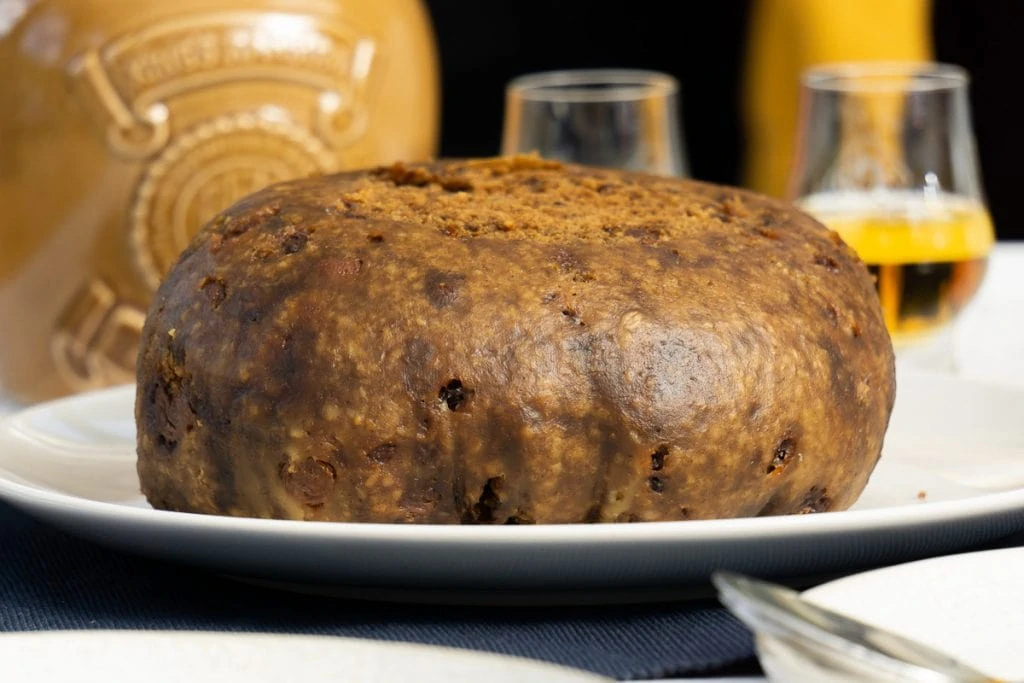
Clootie Dumpling is a king among Scottish desserts. With a rich history and amazing flavour, our clootie dumpling recipe is a real treat!
When we started Scottish Scran, we made a list of all the traditional dishes we intended to make, and a Clootie Dumpling recipe was one of them. Now, this flavoursome pud is a firm family favourite!
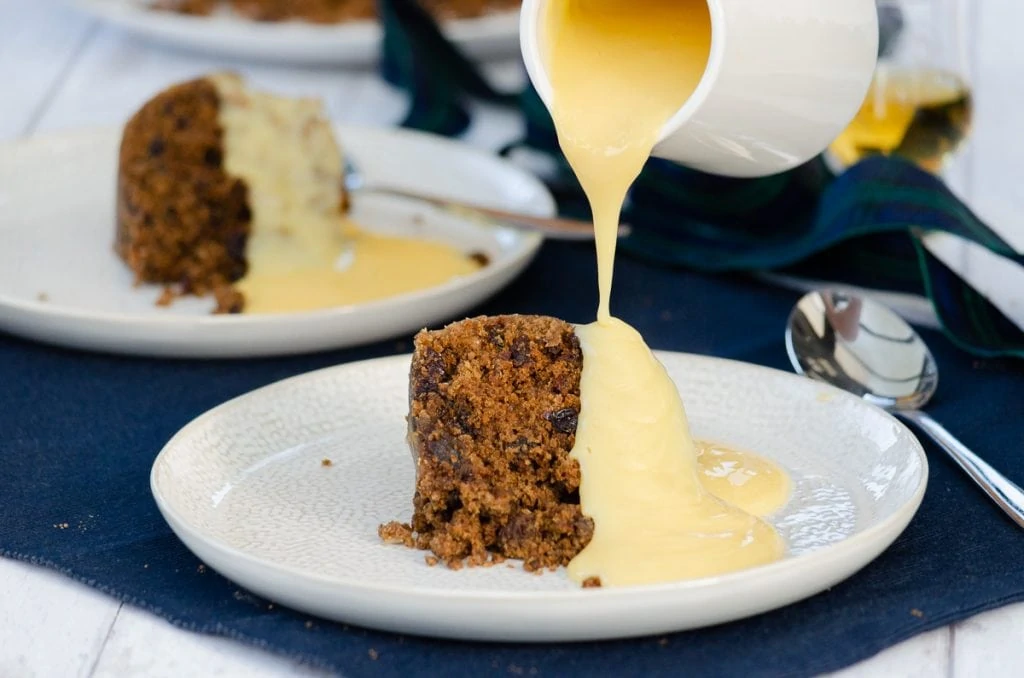
Whenever we ask people in our Facebook group Scottish Scran Stories what their favourite Scottish food is the Clootie Dumpling is named multiple times, usually only surpassed by Tablet!
It’s definitely one of the best Scottish desserts.
So, due to popular demand, we figured it was about time that we put out a Clootie Dumpling Recipe of our own!
This is our full traditional recipe, which is actually pretty simple but takes time. If you’re looking for something a little quicker (and not so traditional!), then check out our Microwave Clootie Dumpling version.
Scroll to the end or use the table of contents to be taken straight to the Printable Recipe Card.
What is a Clootie Dumpling?
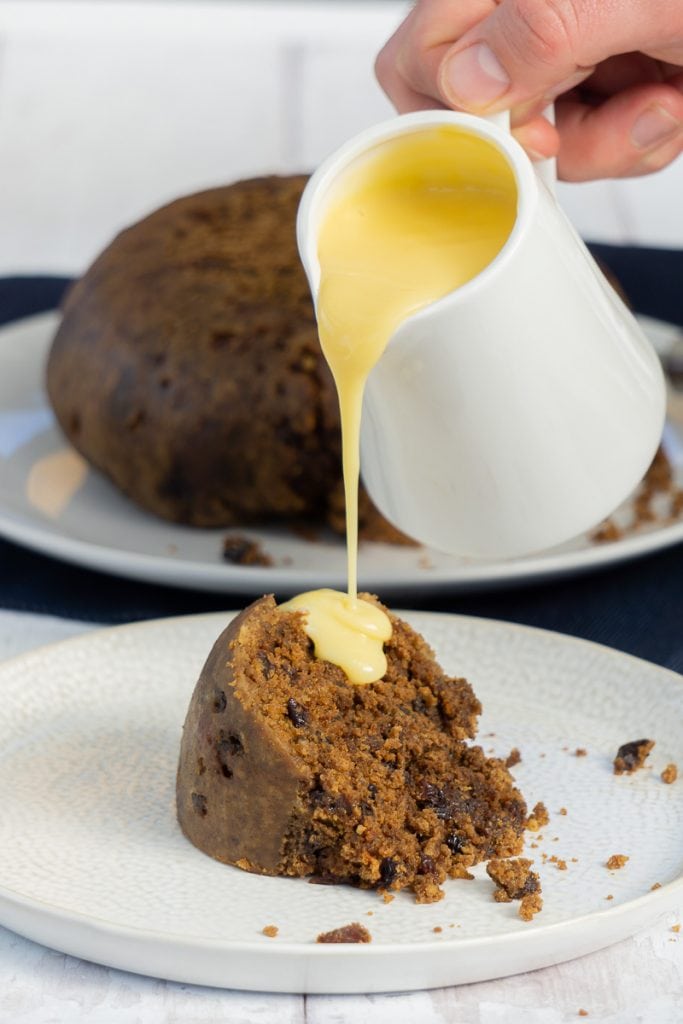
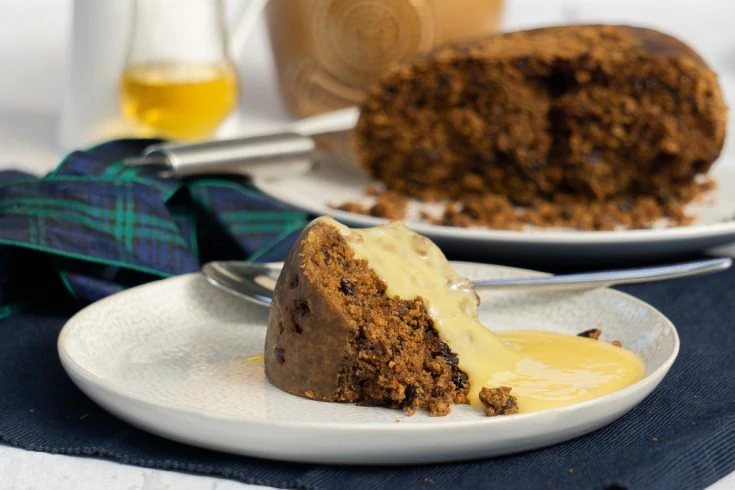
A Clootie Dumpling is a Scottish dessert traditionally made of dried fruit, spices, oatmeal or breadcrumbs, flour, and beef suet. It’s boiled in a cloth, called a “cloot”, hence the name.
Following a Clootie Dumpling recipe means filling your home with an amazing spicy aroma, surpassed only by the delicious taste once it’s ready to eat!
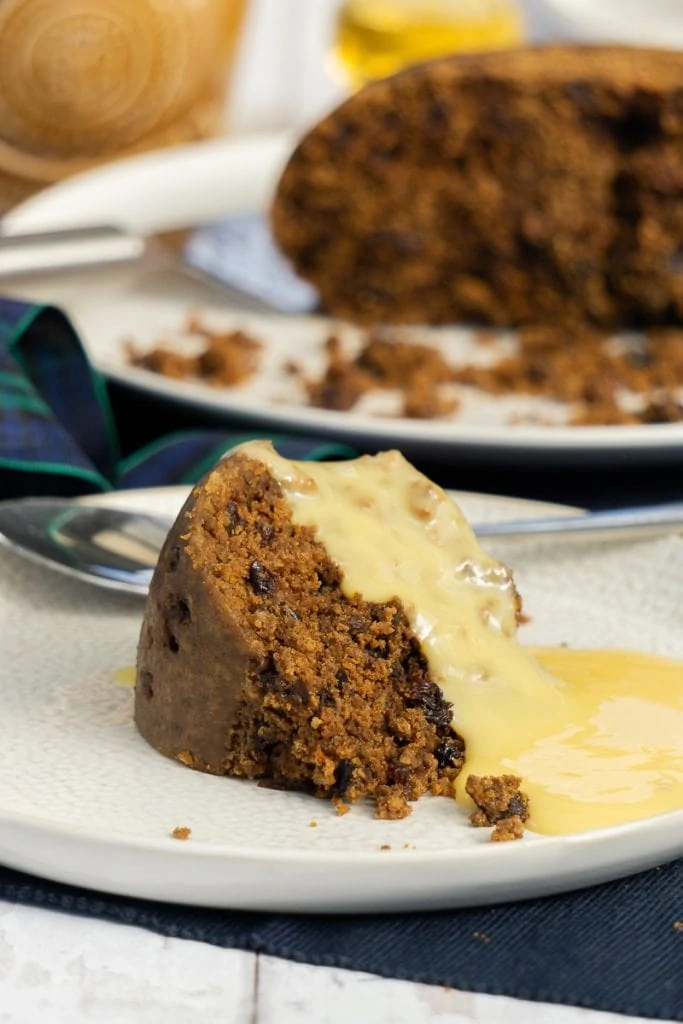
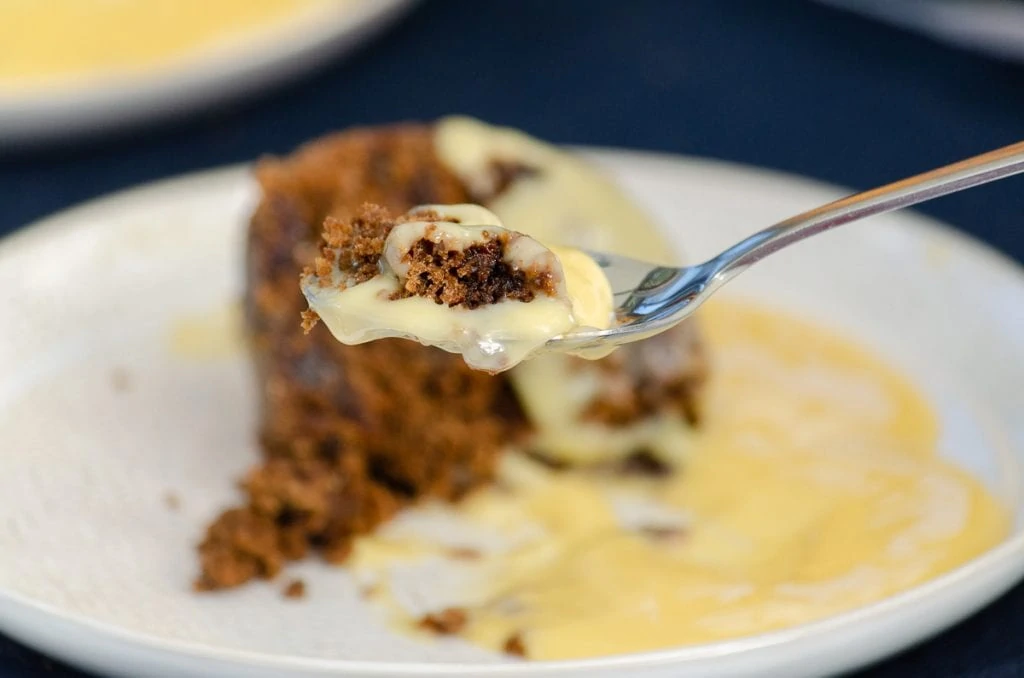
It’s usually served with custard or cream and sometimes even with a little whisky added.
Leftovers are often sliced and fried in butter with bacon and eggs for a scrumptious, if heavy, breakfast.

Where does Clootie Dumpling come from?
Like many traditional Scottish foods, Clootie dumpling recipes vary from family to family and between regions, so its exact origin is unknown. However, it’s possibly thought to date back to the mid 1700s.
What has kept the recipe constant over the years is the boiling in a “cloot” or cloth.
While you will find some microwave clootie dumpling recipes, these don’t allow for the “skin” to form across the dumpling that boiling in a cloth and then allowing it to air dry or oven dry (or in days past, dry by the fire!) does.
The basic ingredients of spices, suet, flour, and dried fruit don’t change, but there are a few different measurements and substitutions.
For example, some clootie dumpling recipes call for oatmeal and others for breadcrumbs in addition to flour, treacle or golden syrup, and even extra additions like grated carrot or apple.
Clootie Dumplings are usually associated with Christmas and Hogmanay (New Year), perhaps due to the similarity to a Christmas pudding, though it’s not quite as rich. But it is also often home to a few coins or charms said to give good luck to the finder. Not so lucky if you chip your tooth on one!
Also often served on Burn’s Night in January, the Clootie Dumpling is a winter-warmer type of recipe and very traditional! Because of the way recipes were handed down through families, it would have been made long before the first recipes were published in the mid 18th century to early 19th century.
The general premise of a Clootie dumpling recipe is fairly simple – dry ingredients are mixed with the wet, then it is wrapped in the floured cloth and simmered for several hours.
The trick is in dusting the cloth with flour to help form the distinctive skin over the dumpling, which is then dried out in the oven or fridge, although it would traditionally have been done in front of the fire.
Things you’ll need to make a Clootie Dumpling
- Large Mixing bowl – we use this one
- Large Baking Tray
- Metal Colander
- Knife or Scissors
- Wooden Spoon
- Large Pot with lid
- Saucer – to fit in the bottom of the pot
- “Cloot” / Clootie Dumpling Cloth – A Muslin or cheesecloth or even an old pillowcase! – we use this one
- String or Cooking Twine
- A clean and dry sink!
Ingredients for Clootie Dumpling
- 200g Plain Flour – additional flour will be required for flouring the cloth and surface of the pudding
- 50g Scottish Oatmeal / Ground Oats
- 150g Suet / Unsalted Butter
- 175g Caster Sugar
- 1 Tsp Ground Ginger
- 1 Tsp Ground Cinnamon
- 1 Tbsp Mixed Spice
- 1 Tsp Baking Powder
- 1/2 Tsp Bicarbonate of Soda
- 3 Tbps Black Treacle
- 2 Eggs (Medium)
- 200g Currants
- 200g Sultanas/Raisins
- 200ml Milk
How to make Clootie Dumpling – Step by step method
Making a Clootie Dumpling can seem a little overwhelming since there are lots of ingredients and lots of steps, but if you follow each one carefully you’ll have no problem!
Take your large mixing bowl and add the flour, oatmeal, suet or butter, sugar, spices, currants, sultanas/raisins, baking powder, and bicarb. Mix together.
In another bowl or jug, mix the treacle, eggs and milk.
Add the wet ingredients to the dry and mix just enough to bring it all together. Set aside.
Take your Clootie Dumpling cloth or “Cloot” and put it in the colander in the sink. Pour boiling water over the cloot, covering it thoroughly. Wait for it to cool enough to handle and squeeze out any excess water and place the cloth on a clean surface. Do watch your fingers!
Once your cloot is laid out sprinkle the entire surface of your cloot with a thin and even layer of flour. You can shake off any excess carefully into the sink.
Your aim, once the cloot is tightly tied, is to have the floured cloot touch the whole surface of the dumpling, transferring the flour from the cloth to the pudding. This creates a thin layer of flour over the entire dumpling mix that will form a tasty skin and hold the moisture in.
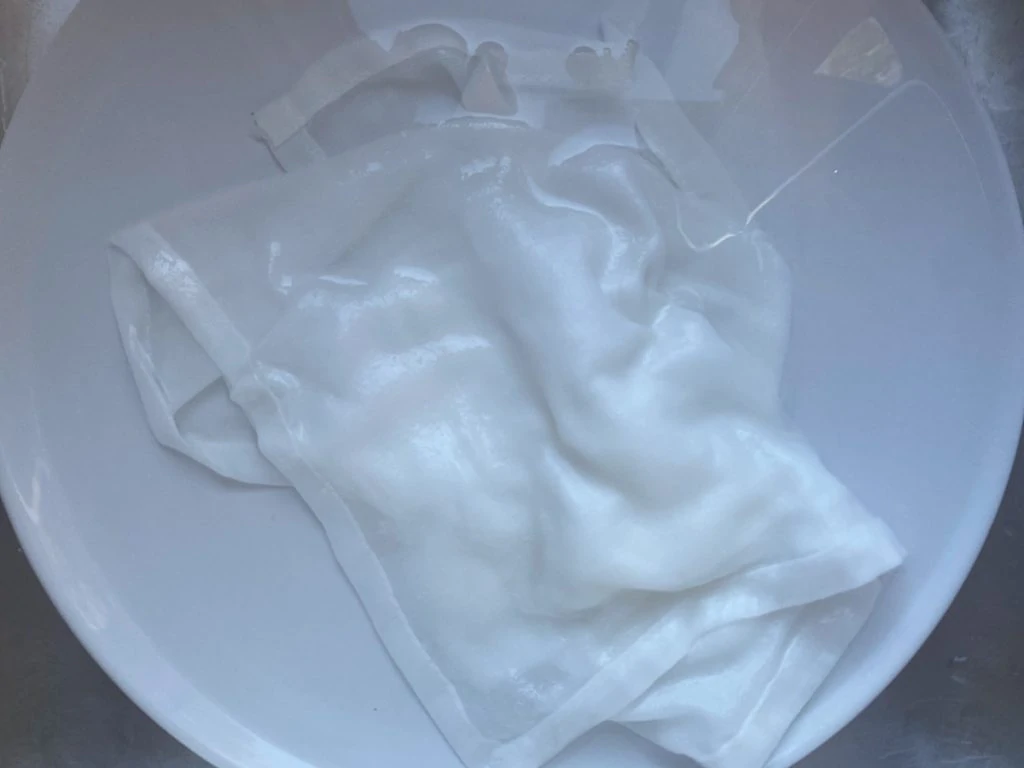
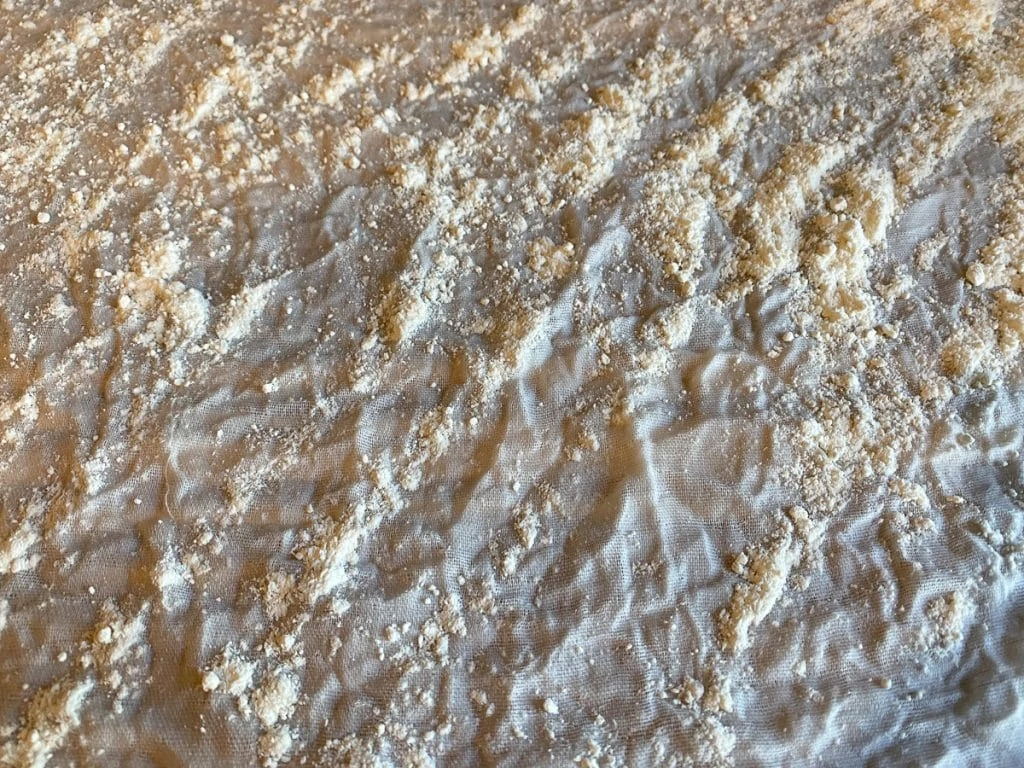
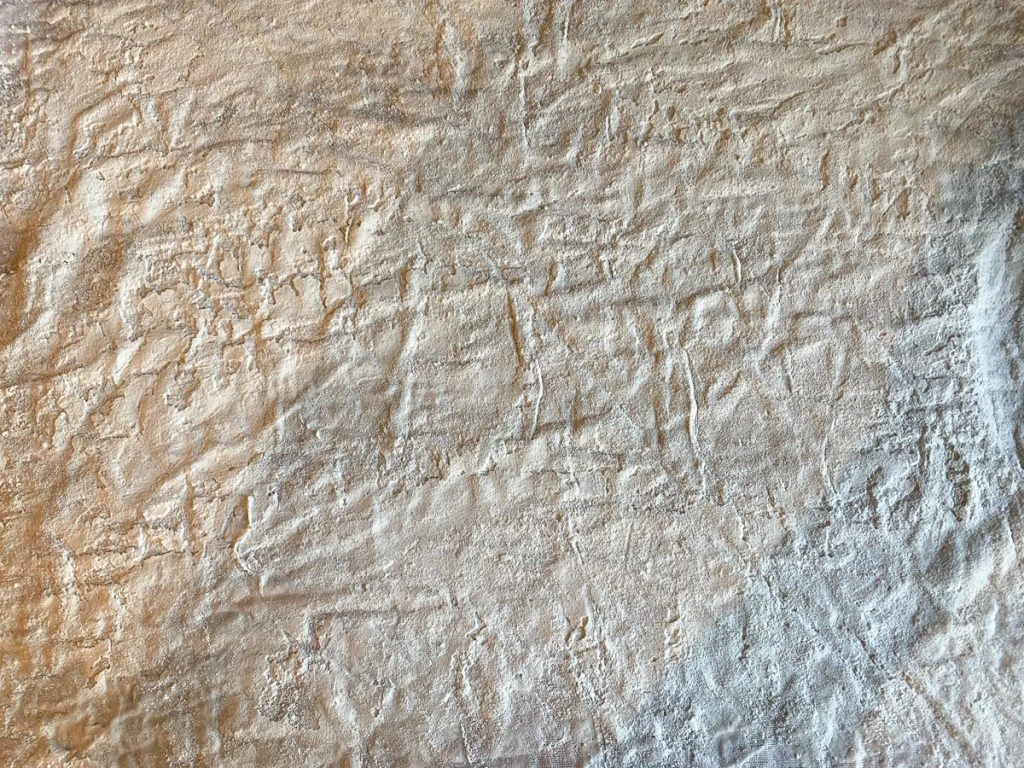
Top Tip: Go easy on the flour! Too much loose flour on the cloot at this stage will not stick to the mix or the cloth and create build-ups as it falls down. These taste hard and floury and ruin the thin skin you’re trying to create so make sure the layer is nice and even.
Place the cloth in a bowl carefully so as not to disturb the flour on it and tip the mixture into the centre.
Cut a long piece of string, roughly half a metre in length depending on your pot and skill with knots.
Draw up the corners and edges of the cloot together to the top of the dumpling, making sure the floured cloot touches the whole surface of the dumpling.
Take your string and tie your cloth’s edges and corners together tightly, roughly in the centre of the length of the string. You want to leave a little space between the top of the dumpling and your knot to allow the pudding to expand.
Place a small plate in the base of your pot; this should be able to withstand heat. It stops your dumpling from resting on the bottom of the pot.
Carefully lift your newly tied clootie dumpling and place it into your pot. We kept the extra length of string to enable you to tie your dumpling to any panhandles on either side you may have, this helps keep it in place and submerged in water.
This all sounds easy, right? Don’t worry to much!
Tip boiling water over your dumpling until it is just submerged. Your dumpling may float a little, this is perfectly fine, but it should be underwater. Turn the heat on, bringing the water to a simmer.
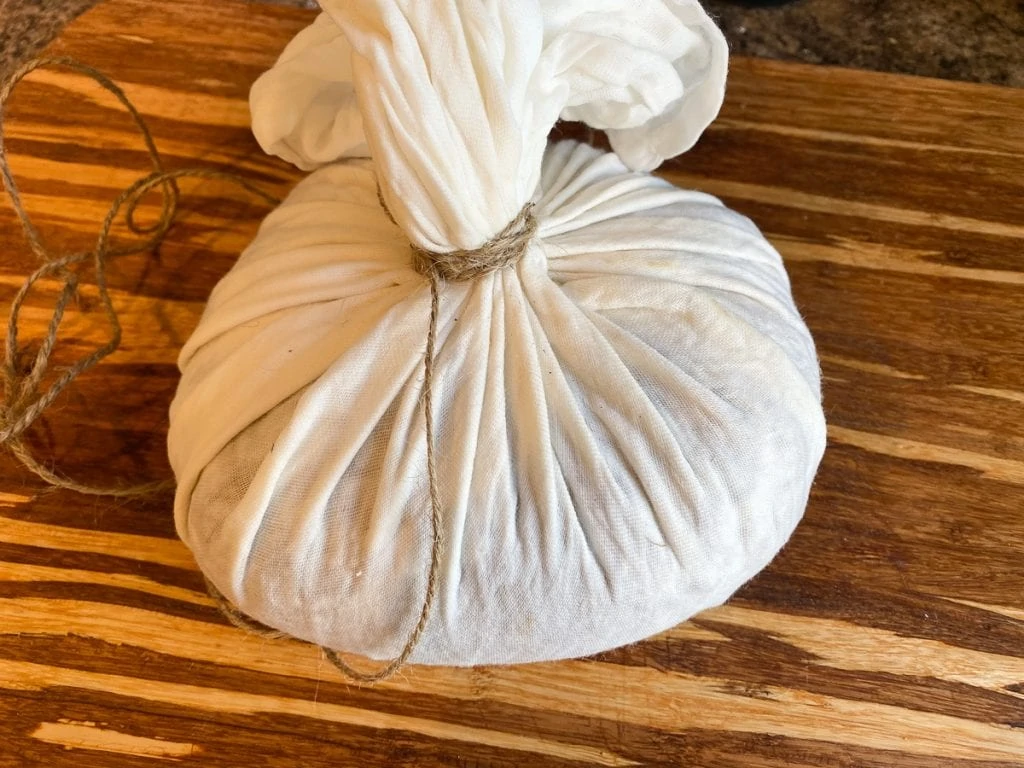
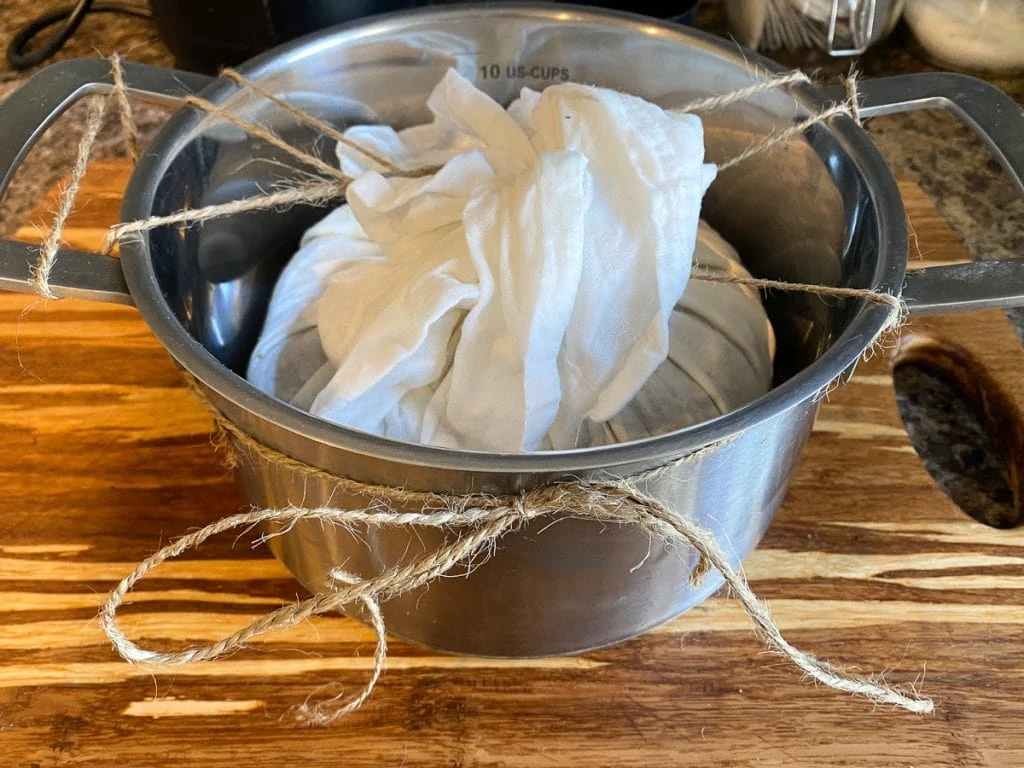
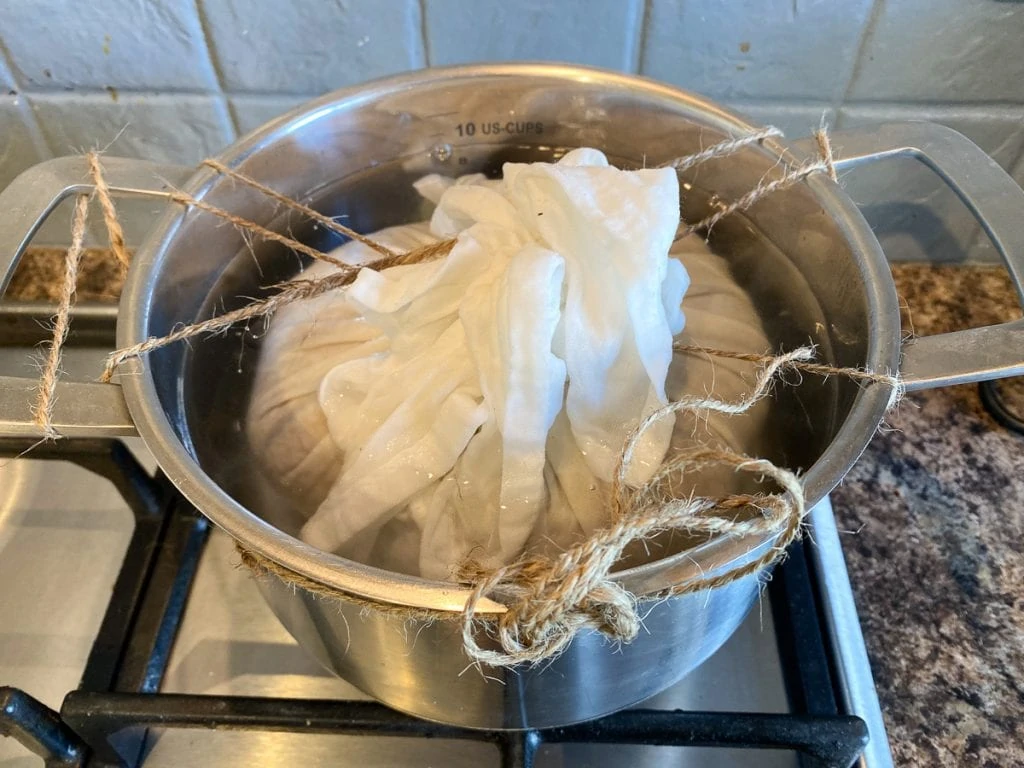
Place the lid of your pan on at a slight angle allowing for steam to escape and set the heat to keep the water gently simmering. Our gas is really quite hot even at its lowest setting so we had to top the water up a couple of times.
If the dumpling expands too much, like ours did, place a wooden spoon under the lid to keep it under control and under the water.
Top Tip: If you have a smaller pot, don’t push the dumpling down too much as this may mean skin won’t form where the dumpling is pushed into the plate at the bottom of the pot. It should gently float while keeping the dumpling submerged. It’s a balancing act but is possible!
Leave to simmer for 3 hours. The water level should cover the top of your dumpling at all times so do add more boiling water to make sure it’s completely covered if required during the cooking time.
Once your dumpling is cooked, take your colander and place it in your sink. Carefully take your dumpling out of the pot and place it in the colander allowing any excess water to drain off. Make sure you don’t move the cloth from the surface of the dumpling at this stage as you may rip the skin.
Preheat your oven to 180°C or 356°F, approx gas mark 4.
Once drained, pick up the clootie dumpling by the knot and put it on a large chopping board or clean heat-proof surface. Using a sharp knife or scissors cut the string at the top of the cloot.
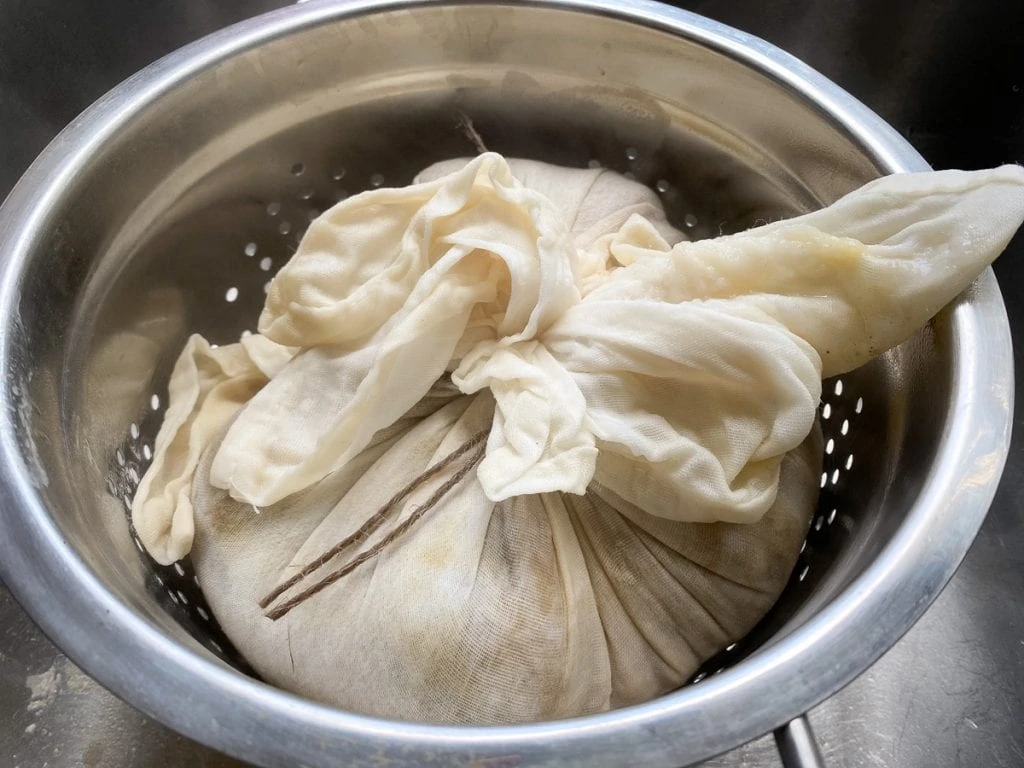
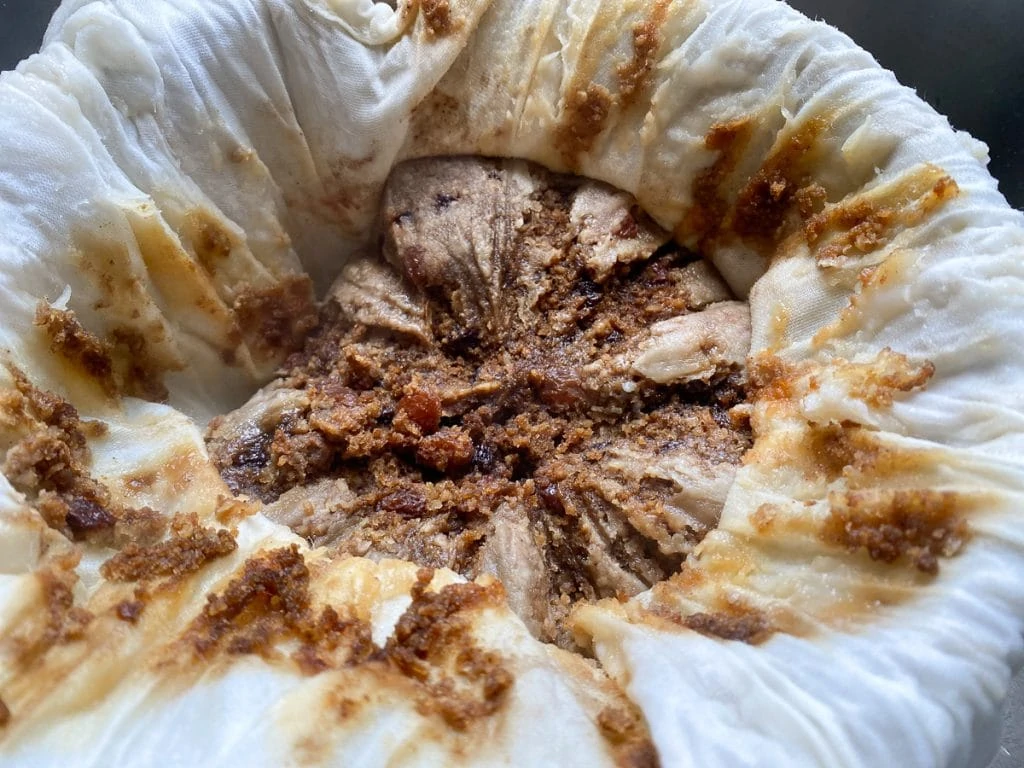
Very carefully peel back the cloot from the dumpling. it is crucial at this stage that you don’t remove the skin formed by the flour. We used the back of a spoon to help keep the skin attached to the dumpling and not the cloot as it’s peeled back.
It’s a slow job and there is no rush but the dream is a dumpling at is completely covered in its newfound skin. The skin may look white and almost fatty but this will darken once placed in the oven and taste great.
Once the cloot is removed, allow it to sit for another 5-10 minutes before placing your dumpling on your baking tray and pop it into the oven for 5 -10mins or until the skin has darkened.
Don’t be tempted to leave it in too long as this can dry out the dumpling. If you’re not serving right away you can leave on the side to cool a little and dry out.
Once your dumpling is done, place it on a serving plate, decide if you’d like custard or cream and serve! Amazing. Your dumpling will last 2-3 days and can be reheated or, as is popular here in Scotland, fried in butter for breakfast – delicious!
Enjoy,
Phil & Sonja
Traditional Clootie Dumpling Recipe
A Clootie Dumpling is a Scottish dessert traditionally made of dried fruit, spices, oatmeal or breadcrumbs, flour, and beef suet. It’s boiled in a cloth, called a “cloot”, hence the name.
Cooking a Clootie Dumpling means filling your home with an amazing spicy aroma, surpassed only by the delicious taste once it’s ready to eat!
Ingredients
- 200g Plain Flour - additional flour will be required for flouring the cloth and surface of the pudding
- 50g Scottish Oatmeal / Ground Oats
- 150g Suet / Unsalted Butter
- 175g Caster Sugar
- 1 Tsp Ground Ginger
- 1 Tsp Ground Cinnamon
- 1 Tbsp Mixed Spice
- 1 Tsp Baking Powder
- 1/2 Tsp Bicarbonate of Soda
- 3 Tbsp Black Treacle
- 2 Eggs (Medium)
- 200ml Milk
- 200g Currants
- 200g Sultanas / Raisins
Instructions
- Take your large mixing bowl and add the flour, oatmeal, suet or butter, sugar, spices, currants, sultanas/raisins, baking powder, and bicarb. Mix together.
- In another bowl or jug, mix the treacle, eggs and milk.
- Add the wet ingredients to the dry and mix just enough to bring it all together. Set aside.
- Take your Clootie Dumpling cloth or "Cloot" and put it in the colander in the sink. Pour boiling water over the cloot, covering it thoroughly. Wait for it to cool enough to handle and squeeze out any excess water and place the cloth on a clean surface. Do watch your fingers!
- Once your cloot is laid out sprinkle the entire surface of your cloot with a thin and even layer of flour. You can shake off any excess carefully into the sink.
- Your aim, once the cloot is tightly tied, is to have the floured cloot touch the whole surface of the dumpling, transferring the flour from the cloth to the pudding. This creates a thin layer of flour over the entire dumpling mix that will form a tasty skin and hold the moisture in.
- Top Tip: Go easy on the flour! Too much loose flour on the cloot at this stage will not stick to the mix or the cloth and create build-ups as it falls down. These taste hard and floury and ruin the thin skin you're trying to create so make sure the layer is nice and even.
- Place the cloth in a bowl carefully so as not to disturb the flour on it and tip the mixture into the centre.
- Cut a long piece of string, roughly half a metre in length.
- Draw up the corners and edges of the cloot together to the top of the dumpling, making sure the floured cloot touches the whole surface of the dumpling.
- Take your string and tie your cloth's edges and corners together tightly, roughly in the centre of the length of the string. You want to leave a little space between the top of the dumpling and your knot to allow the pudding to expand.
- Place a small plate in the base of your pot; this should be able to withstand heat. It stops your dumpling from resting on the bottom of the pot.
- Carefully lift your newly tied clootie dumpling and place it into your pot. We kept the extra length of string to enable you to tie your dumpling to any panhandles on either side you may have, this helps keep it in place and submerged in water.
- Tip boiling water over your dumpling until it is just submerged. Your dumpling may float a little, this is perfectly fine, but it should be underwater. Turn the heat on, bringing the water to a simmer.
- Place the lid of your pan on at a slight angle allowing for steam to escape and set the heat to keep the water gently simmering. Our gas is really quite hot even at its lowest setting so we had to top the water up a couple of times. If the dumpling expands too much, like ours did, place a wooden spoon under the lid to keep it under control and under the water.
- Leave to simmer for 3 hours. The water level should cover the top of your dumpling at all times so do add more boiling water to make sure it's completely covered if required during the cooking time.
- Once your dumpling is cooked, take your colander and place it in your sink. Carefully take your dumpling out of the pot and place it in the colander allowing any excess water to drain off. Make sure you don't move the cloth from the surface of the dumpling at this stage as you may rip the skin.
- Preheat your oven to 180°C or 356°F, approx gas mark 4.
- Once drained, pick up the clootie dumpling by the knot and put it on a large chopping board or clean heat-proof surface. Using a sharp knife or scissors cut the string at the top of the cloot.
- Very carefully peel back the cloot from the dumpling. it is crucial at this stage that you don't remove the skin formed by the flour. We used the back of a spoon to help keep the skin attached to the dumpling and not the cloot as it's peeled back. It's a slow job and there is no rush but the dream is a dumpling at is completely covered in its newfound skin. The skin may look white and almost fatty but this will darken once placed in the oven and taste great.
- Once the cloot is removed, allow it to sit for another 5-10 minutes before placing your dumpling on your baking tray and pop it into the oven for 5 -10mins or until the skin has darkened.
- Serve with custard or cream!
Notes
Here's a couple of additional tips:
Go easy on the flour! Too much loose flour on the cloot at this stage will not stick to the mix or the cloth and create build-ups as it falls down. These taste hard and floury and ruin the thin skin you’re trying to create so make sure the layer is nice and even.
If you have a smaller pot don’t push the dumpling down too much as this may mean skin won’t form where the dumpling is pushed into the plate in the bottom of the pot. It should gently float while keeping the dumpling submerged. It’s a balancing act but is possible!
Nutrition Information:
Yield:
6Serving Size:
1Amount Per Serving: Calories: 728Total Fat: 29gSaturated Fat: 15gTrans Fat: 0gUnsaturated Fat: 11gCholesterol: 86mgSodium: 159mgCarbohydrates: 108gFiber: 5gSugar: 54gProtein: 12g
The nutritional data in this recipe is provided by a third party and these values are automatically calculated and offered for guidance only. Their accuracy is not guaranteed.
Other Traditional Scottish Desserts Recipes
- Simple Microwave Clootie Dumpling Recipe – quicker, but just as tasty!
- Cranachan – a delicious mixture of cream/crowdie, oats, honey, whisky, and raspberries
- Scottish Cranachan Cheesecake Recipe – adding the taste of Cranachan to our no-bake cheesecake
- Dundee Cake – made with delicious orange marmalade and decorated with a distinctive almond pattern
- Ecclefechan Tarts – sort of like a Scottish Christmas mince with dried fruit and butter in a pastry case
- Scottish Tablet – a melt-in-your-mouth sugary confection similar to a fudge, but with a harder texture
- Caledonian Cream – a simple dessert with whipped cream, marmalade and whisky liqueur
- Tipsy Laird – the Scottish version of a trifle
Pin for later!

The clothe looks delicious!
Can I use my pressure cooker instead?
Hi Anna,
That’s a very good question and to be quite honest I don’t know. This is the only way we’ve known to cook it so would hate to give you bad advice!
this is nothing like my mothers she never put oats in it
We would hate to have copied your mother’s recipe so that’s good.
You can use a pressure cooker but unfortunately I don’t know the method or time. Sorry! I was very young when I’d watch my Granny making the dumpling, and I’ve never used pressure cookers coz they frighten the live out off me 😆.
I’m from West Coast of Scotland and I’d never heard of using oatmeal instead of flour, but I love this and will be trying out the oatmeal recipe version . Many thanx xxx
Yes – 45mins in a pressure cooker works for me every time! Less steam in the house but just as tasty. Or, I set the pan on our log burner and let the heating do the trick
As a kid we would be treated to Clootie dumpling made by my grandfather instead of birthday cake (1970’s). He would use a pressure cooker and greatly reduce the cooking time
Made this today using (frozen & grated) butter instead of suet and golden syrup instead of treacle (couldn’t source those ingredients easily here in France). It turned out very nicely! Thanks.
Great comment thank you! Some great ideas for ingredient variations, we’ll have to give them a try.
I’m vegan so used vegetable suet, soy milk, and aquafaba instead of eggs, but this recipe seemed to adjust fine! My pudding wasn’t perfect (I didn’t add enough milk so it was a little dry, and I think I tied the cloot too loosely because the pudding had too much room and split a little) but it still tasted very nice, and I managed to get good solid slices from it.
Just a note: the flour is missing from the ingredients in the recipe card! I know it’s in the recipe instructions but I missed it, and had to add it at the end which was a real pain. Just thought you might want to add it to make sure nobody misses it like I did 🙂
The flour seems to have just appeared?! Perhaps I had an old version of the page open….
We had just updated recently so possibly! But thank you for letting us know 😀
That’s great to know how well it adjusted thank you! We intend on testing the recipes with vegetarian/vegan alternatives but it’s a slow process, unfortunately! We’re glad it worked out for you 🙂
Thank-you for posting this. I cannot eat beef and was hoping for some substitutions.
Hi Phil & Sonja
I am going to try this recipe for the first time, could you tell me what material the small plate is that you use in the pot. I am not sure if it’s Pyrex,China ceramic.
Hi Margaret,
Very exciting! We just used a normal plate from our dinner set as it was small enough to fit in the pot. It can be anything that can withstand heat, so what you would put in your dishwasher or could be used in an oven. It says “stoneware” on the bottom of ours but porcelain would be fine too.
Do let us know how you get on!
Hi Phil & Sonja
I made the clootie dumpling on Saturday. I must have added too much milk because the dumpling was very sticky, so I added some flour to try and bind it better. After the 3 hours cooking time when I removed the cloth and put the pudding on a tray a quarter of the pudding fell apart so something definitely went wrong for me, the pudding itself looked pale as you said it would and once I put it into the oven the skin did darken, the pudding itself is very crumbly and a bit dry it does taste nice but obviously it’s not the way it should be, the other thing I noticed when I opened the cloth there was some water in the bottom of the cloth maybe that shouldn’t have happened either. I will give it a try again some time soon.
Margaret
Good morning, my parents were Scottish and my mother cooked this every Christmas. We loved it, especially fried with bacon and eggs. We always looked forward to breakfast after Christmas.
I am 66 years old, this will be my first Christmas to cook it. Thank you for the recipe 😊😊
You’re welcome! We love how many happy memories this brings up.
I remember we used to have this at Halloween, and it was filled with sixpence’s or thruppence’s, brings back memories, been looking for the recipe for a long time
Brilliant
Alastair
Hi, I remember my granny making us a dumpling for Christmas every year when I was a girl. It must be more than 40 years since I last had one of grannies dumplings. I’m going to try your recipe out this Christmas to gift to my family since I can’t be there on the day. How early can I cook it before I give it to them? Should I give it to them in the cloot to peel and bake? Or bake it then gift it?
Clootie Dumpling is best enjoyed the day of making, and then slices fried in the days after. You could gift all of the ingredients and a cloth with instructions? Or you could try to do it the day before and reheat slices quickly in the microwave and then have with liberal amounts of custard!
Can you please clarify what type of oatmeal is called for? In Scotland oatmeal comes in a variety of grades such as fine, coarse, pinhead, (all of which I think might be called steel-cut in US). We can also buy rolled oats or quick porridge oats. Very fine ground oats would be called oat flour. The texture would be very different with pinhead oatmeal than with oat flour, for example.
Scottish oatmeal is stone-ground oatmeal. The groats are ground and broken into small bits.We go into this in our porridge recipe if that helps
Great recipe, instructions, and lots of useful comments from your followers.
I have fond memories of making this with my mother as I grew up. Best ‘pudding’ ever! And of course, everyone (and rightly so!) thinks their Mum, Granny, Granddad et al had the BEST recipe. I have looked at several online now, and all seem to have the same core ingredients, with regional, or family variations on a theme. My wife’s granny added 1 grated carrot to hers, and trust me you will not be disappointed if you add it.
Thanks for sharing such a detailed step-by-step feature, and also evoking cherished childhood memories!
Very much our pleasure!