Sticky Toffee Trifle. Really?
Sticky Toffee Pudding.
In a Trifle.
Yes, we went there!
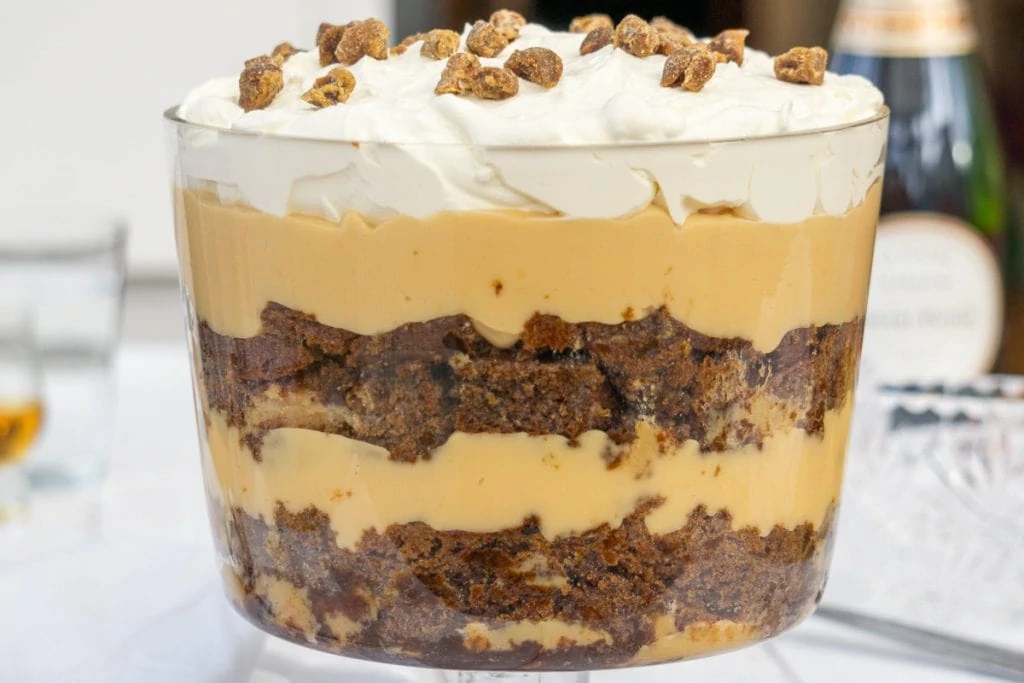
What is a Sticky Toffee Trifle:
Sticky Toffee Pudding is one of our absolute favourite desserts and while it’s origins are a little under debate (you can read more in our Sticky Toffee Pudding Microwave post) it’s a dish that’s readily available across Scotland and many visitors try it for the first time here.
The origins of Trifle are more decidedly English, with variations appearing in cookbooks from the 1500s. A trifle is classically made of layers including a sponge cake, fruit, custard, and cream. The sponge is often soaked in either jelly, fruit juice, or alcohol like sherry.
Now, just because the tasty trifle seems to be decidedly English doesn’t mean Scotland doesn’t have its own version – the amazing Scottish Trifle: The Easiest Tipsy Laird Recipe has to be mentioned!
So, how did we come to make a Sticky Toffee Pudding Trifle?
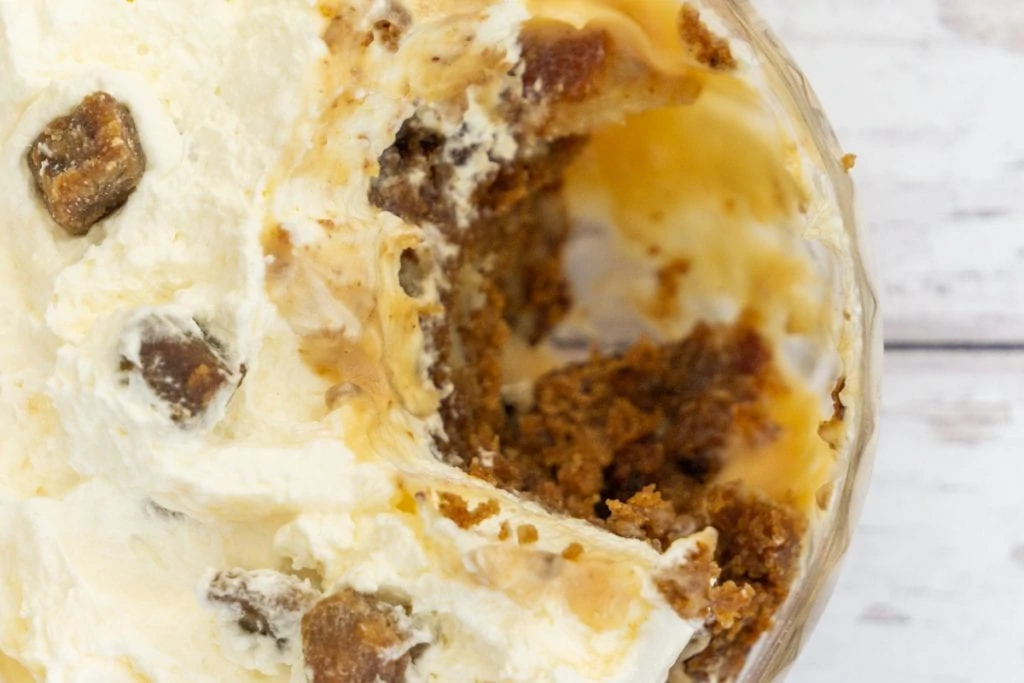
The humble trifle has evolved and you can now find lots of different takes on this traditional dessert, including those that take another dessert and transform it into trifle form. We’ve seen chocolate trifles and banoffee pie trifles, so we thought, why not a Sticky Toffee Pudding Trifle?
And here we are at what could be the perfect fusion of Scottish and English puddings!
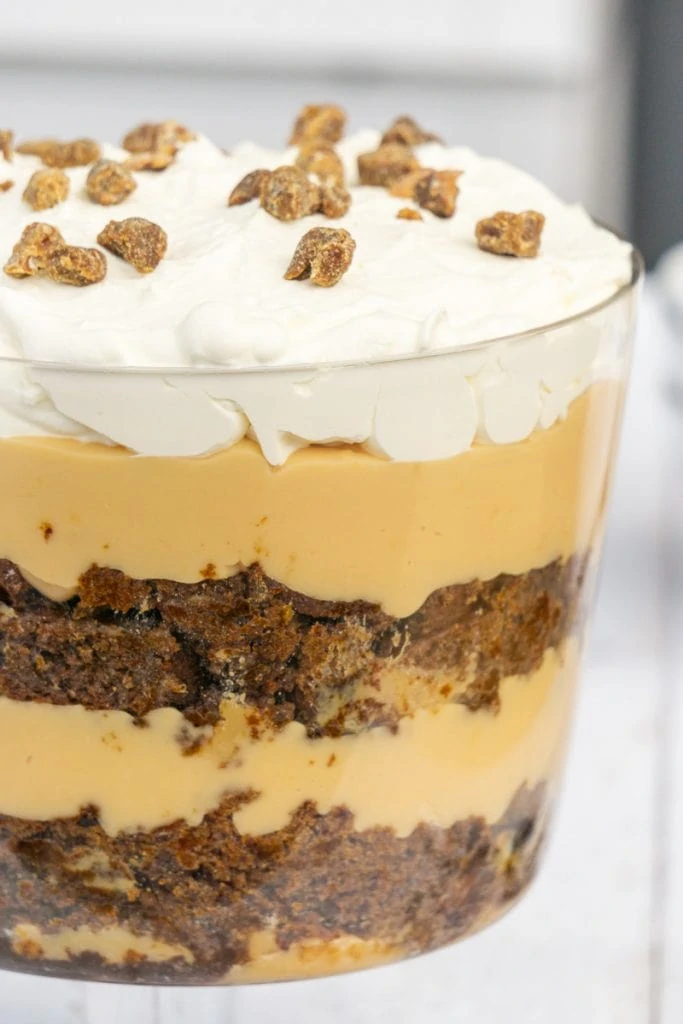
We’ve kept the traditional layering effect of trifle, but changed up the ingredients a little. Starting with a layer of our sticky toffee pudding traybake, to replace the traditional sponge, then topped our creation with caramel custard and then whipped cream. We also used a rich caramel sauce to help hold it all together, yum!
Things you’ll need to make Sticky Toffee Trifle
- A large pot, and we mean large!
- Trifle dish – like this one
- Large mixing bowl – like this one
- Wooden spoons
- Electric Beater
- Scales – like this one
- Measures – like these ones
- Measuring jug
- Medium mixing bowl
- Traybake tin – we used a 38 x 27 x 7 cm tin like this one (15 x 10.5 x 3in). This is a little larger than other traybake tins so if you use a smaller size the cake will just be taller.
- Baking paper – it’s easier to line the tin with baking paper but you can just grease with butter if you prefer.
Links to the items we’ve used go to our UK Amazon store, if you’re based in the US you can find them all here.
Ingredients for Sticky Toffee Pudding Trifle
Caramel Custard
- 350g granulated sugar to heat (1 cups + ½ cup + 2 tbsp)
- 50g granulated sugar for egg mix ( 3 tbsp + 2 tsp)
- 125ml water ( ½ cup )
- 960ml milk (4 cups)
- 8 egg yolks
- 85g Cornflour ( ½ cup + 3 tbsp)
Sticky Toffee Pudding Traybake
Instructions for making this can be found on the recipe card below or on our original recipe, we’ve added the ingredients here in case you need them for a shop!
Traybake Sponge
- 250g chopped dates (approx 2 cups) – You can buy chopped dates or chop them yourself. If you plan to chop them yourself then get pitted dates!
- 125ml boiling water (½ cup)
- 1 tsp baking soda
- 200g brown sugar (1 cup + 2tbsp)
- 125g butter (½ cup +1tbsp)
- 2 large eggs
- 1 tsp vanilla essence
- 150g plain all-purpose flour (1 cup)
Traybake Caramel Sauce
- 100g butter (7 tbsp or approx ½ cup)
- 85g light brown sugar (approx ½ cup)
- 2x 397g tins of sweetened condensed milk
Trifle Topping
- 600 ml Double (Heavy) Cream (2.5 cups)
- A handful of chopped dates
How to make a Sticky Toffee Pudding Trifle – Step by step method
It’s necessary to make each of the trifle’s components separately to allow time for cooling. Give yourself enough time for each and make sure you have measured each component’s ingredients separately to avoid any confusion.
1st Component – Caramel Custard: This needs 4-6 hours to cool in the fridge and set a little so we would suggest doing this the night before.
2nd Component – The Sticky Toffee Pudding Traybake: This has to be cold when you begin to build the trifle otherwise the custard will become runny and the cream will melt. Ideally make a few hours before assembly or the night before too.
3rd Component – The Whipped Cream: This can be done just before serving to keep it as fresh as possible maintaining the volume added by the whipping process.
***Top Tip*** This recipe makes enough trifle for a large trifle dish and two layers of sponge and custard. If you don’t want to be eating trifle for the whole week reduce the custard ingredients by half. You can do the same for the traybake and bake in a smaller tin or, as we’ve done before, use half for the trifle and share the other half with friends.*
*we might have eaten it…
1st Component – Caramel Custard
- Separate the yolk of 8 eggs from the white. We did this by cracking the egg and gently passing the yolk from one half of the shell to the other over a bowl allowing the white to run out.You can make meringues from these egg whites if you’re feeling really keen! Put these to one side.
- In a large pot add 350g sugar (leaving the other 50g to one side for now) and 125ml of water.
- Heat slowly over a medium heat without stirring. You’ll want to stir, we wanted to stir, but try not to give in to temptation – at best swirl once or twice! We use a gas hob and find this a lot hotter than electric but we started in the middle of the dial if that helps.
- The mix will start to bubble and even solidify at the edges but don’t panic this will all even out later.
- Watch the mix closely, you’re looking for it to turn a light brown/amber colour.
- While this is happening warm the milk, we used the microwave for ease. Don’t boil it, just gently warm it.
- Once the mix changes colour slowly add the warmed milk whisking the mix as you do.
- **** WARNING**** The mix is very hot so the milk will make it foam up in a very angry manner! Be very careful not to burn yourself and keep adding the milk. This is why you need the large pot, ours wasn’t big enough and it took us a long time to clean our stovetop!
- Once all the milk has been added and the mix is a nice light caramel colour leave it on a very low heat or just set to one side.
- Take the mixing bowl and mix the remaining 50g sugar and 85g cornflour.
- Add the yolks to the sugar and cornflour and whisk.
- While you whisk the mixture add a spoonful or two of the warm milk. Once this is well mixed add it all to the original pan.
- Heat the mix over a low heat, whisking all of the time until the mixture slowly thickens and turns into a smooth custard. This can take 10-12mins so prepare your arms.
- *** Top Tip**** Be careful not to let the custard boil as this can mean it’s more likely to curdle and look like there’s scrambled egg in it. If curdling starts, remove the mix from the heat straight away and mix vigorously. Once smooth return to a very low heat and continue to stir.
- When you’re happy with the custard pour it into the medium bowl. This can then be set to one side to cool.
- Once the custard has cooled enough to touch, cover with clingfilm making sure the film touches the surface to avoid a skin forming, Many people like a skin on their custard but not really in trifle! Then place in the fridge for 4-6 hours.
2nd Component – Traybake
You can find our traybake instructions here or in the recipe card below. The traybake must be cooled so it will need to be left several hours after it’s finished baking.
The only thing to change from our traybake recipe is when you’re adding the caramel sauce. For our Sticky Toffee Pudding traybake, you add half the sauce to the middle of the sponge and then the other half to the sauce to the top.
For your trifle just add half the mix to the centre of the bake and keep the rest of the sauce to one side to help you build your trifle.
3rd Component – Whipped Cream
Once your first two components are ready and cooled you just need to whip the cream, and then you’re ready to start building the trifle. Place the cream into a large mixing bowl and, with your electric beater, whip the cream until it forms soft peaks. You can then put this to one side.
How to assemble a Sticky Toffee Trifle
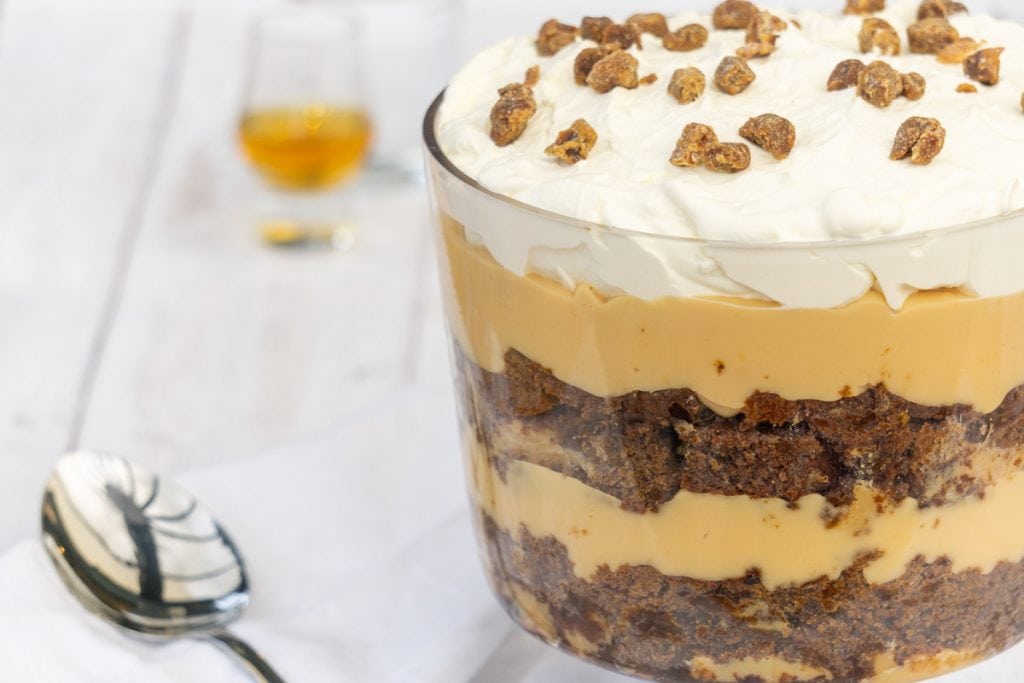
We layered our Sticky Toffee Pudding Trifle like this, the sponge gives a solid foundation and the cooled custard is solid enough to hold a second layer.
Top
- Cream
- Custard
- Sponge and Sauce
- Custard
- Sponge and Sauce
Bottom
Assembly Steps
- Take the cooled traybake, gently place it on a chopping board and cut it in half. We used one half of the traybake per layer. The size of these layers will, of course, depend on your trifle dish. Ours is 22 x 22 x 22 cm, you can find it here.
- Cut each half of the bake into squares of around 6cm x 6cm.
- Take half of the squares (half the bake) and begin to place them in the bottom of your trifle dish. We started with a square in the middle then built out from there.
- Pack the sponge in as tightly as possible to keep the layer solid once the custard is added. This will mean breaking up some of your squares to make them fit.
- We then added the leftover caramel sauce to the small gaps to fill the holes and add a little extra taste. This may need a little reheating if it’s become too thick to drizzle in. Think of it as sweet cement!
- Once the bottom layer is nicely packed in, take your custard, again we used half the custard per layer, and spoon it onto the centre of the sponge. Keep spooning it on to form an even layer. The thickness of this will depend on your dish. Our layers were 2-3cm thick. When you finish this the custard should cover the whole sponge layer and be as even as possible.
- If you’re only doing one layer of each segment, skip ahead to the cream.
- Take the other half of the traybake and begin the second sponge layer repeating the process as before. Although this does need to be packed tightly like the first layer, place each square on to the custard as gently as possible. If you press too hard the layers won’t be defined, this isn’t the end of the world from a taste point of view, but it will make it look like a big bowl of custard!
- Once you’re happy with the second sponge layer, begin the second custard layer, exactly like before adding each spoonful gently and evenly.
- Take your whipped cream and two spoons, use one spoon to scoop the cream up and the other to scrape it from the spoon on to the trifle.
- Begin in the middle and be very gentle in placing the cream on top to allow the cream to form its own layer and not blend in with the custard.
- Use your spoons to spread the cream evenly across the whole layer, covering the custard completely.
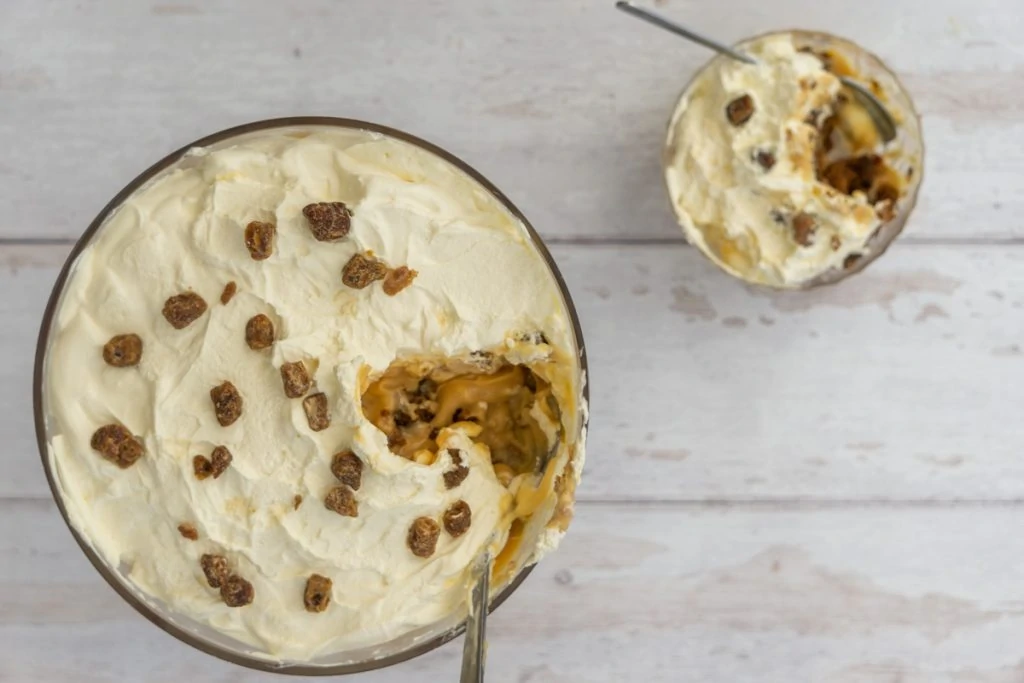
- Finally, scatter a few chopped dates on to the top of the cream as a deliciously chewy garnish.
And there you have it, a five-layer Sticky Toffee Trifle.
It seems like a lot of work but it is well worth it, an amazing fusion of two classically delicious puddings,
What more could you want!
Variations
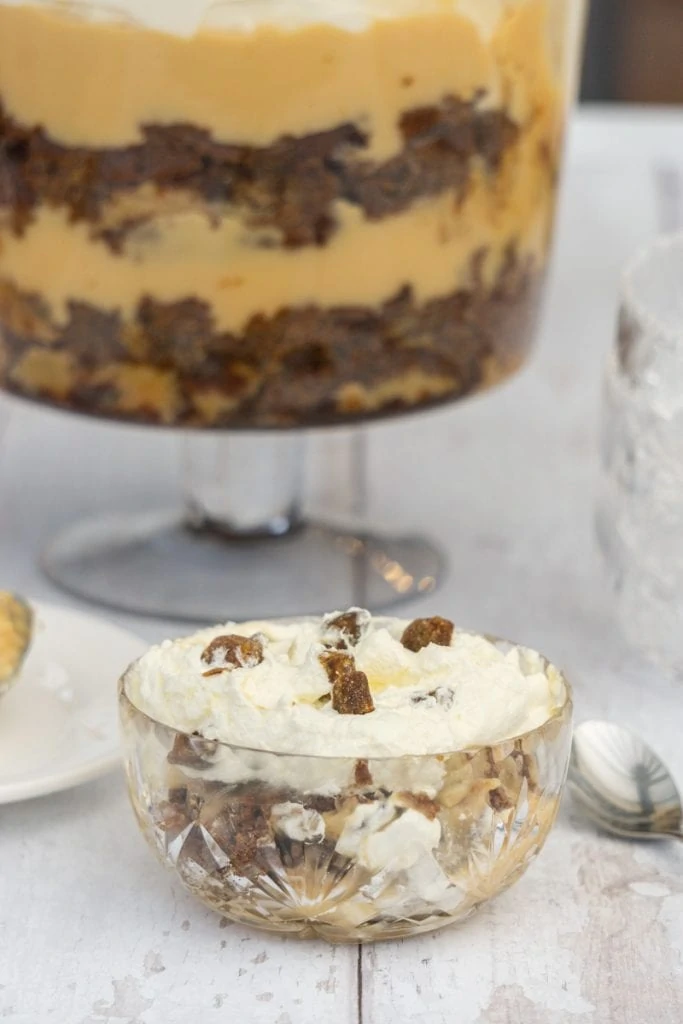
Alcohol – Often Trifle is made using sherry, or in the case of a Tipsy Laird, whisky. If you want to add that extra kick we would suggest using whisky, dark rum or spiced rum in your Sticky Toffee Pudding Trifle. Add 6-8 tbsp to your first layer of sponge once it is packed into the bottom of your trifle dish. This should be more than enough to give it a kick, less is more in this case!
Fruit – As we’ve said, this is a very sweet and decadent pudding so a little acidity in the mix helps break up the richness involved. We suggest adding a layer of raspberries on top of your final custard layer, or decorating the top of the cream with raspberries.
When we were eating our trifle the next day we scattered blueberries on it and this worked really well, just enough of a burst of bitter to balance all the gooey sweetness.
Salt – It’s almost unusual these days to see caramel without it being salted! We’re big fans of all things salted caramel and can easily see how it would work in our trifle. We would suggest adding the salt to the caramel sauce in the sticky toffee traybake.
How much salt to use very much depends on the sea salt you’re using and your own taste. We suggest you start with 1-2 teaspoons of sea salt, stir then taste. This should be enough but if not add more slowly, if you overpower it you’ll have to start again!
Frequent questions
Does it have to be Caramel Custard?
You can, of course, use regular custard, this will lighten the taste a little which may make it a little less rich. Personally, we’ve preferred the caramel taste as it works really well with all the sticky goodness.
Do you have to make your own custard?
No, bought custard works perfectly well especially if you’re not looking to make caramel custard. You could also buy a caramel sauce and stir this into your custard. The only thing we would suggest is that you pop the bought custard in the fridge once you’ve added any extra flavouring to help it set a little before adding it to your trifle.
Sticky Toffee Trifle
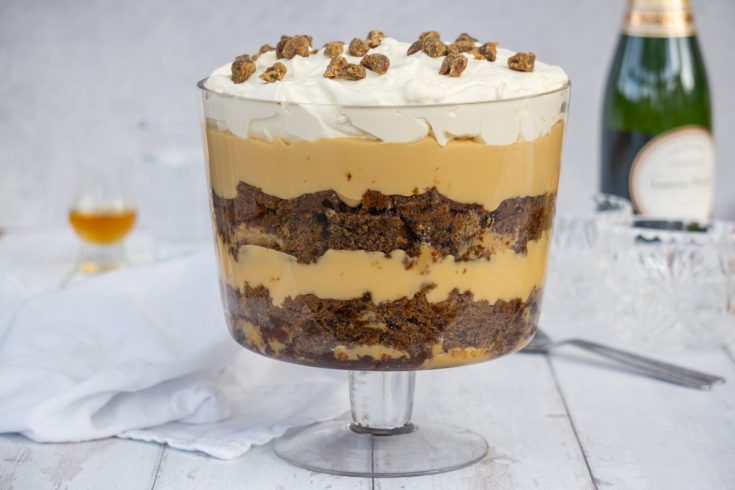
The humble trifle has evolved and you can now find lots of different takes on this traditional dessert, so we thought, why not a Sticky Toffee Pudding Trifle? We think it could be the perfect fusion of Scottish and English puddings!
We’ve kept the traditional layering effect of trifle, but changed up the ingredients a little. Starting with a layer of our sticky toffee pudding traybake, to replace the traditional sponge, then topped our creation with caramel custard and then whipped cream. We also used a rich caramel sauce to help hold it all together, yum!
Ingredients
Caramel Custard
- 350g granulated sugar to heat (1 cups + ½ cup + 2 tbsp)
- 50g granulated sugar for egg mix ( 3 tbsp + 2 tsp)
- 125ml water ( ½ cup )
- 960ml milk (4 cups)
- 8 egg yolks
- 85g Cornflour ( ½ cup + 3 tbsp)
Sticky Toffee Pudding Traybake
- 250g chopped dates (approx 2 cups) - You can buy chopped dates or chop them yourself. If you plan to chop them yourself then get pitted dates!
- 125ml boiling water (½ cup)
- 1 tsp baking soda
- 200g brown sugar (1 cup + 2tbsp)
- 125g butter (½ cup +1tbsp)
- 2 large eggs
- 1 tsp vanilla essence
- 150g plain all-purpose flour (1 cup)
Traybake Caramel Sauce
- 100g butter ( 7 tbsp or approx ½ cup)
- 85g light brown sugar (approx ½ cup)
- 2x 397g tins of sweetened condensed milk
Trifle Topping
- 600 ml Double (Heavy) Cream (2.5 cups)
- A handful of chopped dates
Instructions
It's necessary to make each of the trifle's components separately to allow time for cooling. Give yourself enough time for each and make sure you have measured each component's ingredients separately to avoid any confusion.
1st Component - Caramel Custard: This needs 4-6 hours to cool in the fridge and set a little so we would suggest doing this the night before.
2nd Component - The Sticky Toffee Pudding Traybake: This has to be cold when you begin to build the trifle otherwise the custard will become runny and the cream will melt. Ideally make a few hours before assembly or the night before too.
3rd Component - The Whipped Cream: This can be done just before serving to keep it as fresh as possible maintaining the volume added by the whipping process.
***Top Tip*** This recipe makes enough trifle for a large trifle dish and two layers of sponge and custard. If you don’t want to be eating trifle for the whole week reduce the custard ingredients by half. You can do the same for the traybake and bake in a smaller tin or, as we’ve done before, use half for the trifle and share the other half with friends.*
*we might have eaten it…
1st Component - Caramel Custard
- Separate the yolk of 8 eggs from the white. We did this by cracking the egg and gently passing the yolk from one half of the shell to the other over a bowl allowing the white to run out.You can make meringues from these egg whites if you're feeling really keen! Put these to one side.
- In a large pot add 350g sugar (leaving the other 50g to one side for now) and 125ml of water.
- Heat slowly over a medium heat without stirring. You’ll want to stir, we wanted to stir, but try not to give in to temptation - at best swirl once or twice! We use a gas hob and find this a lot hotter than electric but we started in the middle of the dial if that helps.
- The mix will start to bubble and even solidify at the edges but don’t panic this will all even out later.
- Watch the mix closely, you’re looking for it to turn a light brown/amber colour.
- While this is happening warm the milk, we used the microwave for ease. Don’t boil it, just gently warm it.
- Once the mix changes colour slowly add the warmed milk whisking the mix as you do.
- **** WARNING**** The mix is very hot so the milk will make it foam up in a very angry manner! Be very careful not to burn yourself and keep adding the milk. This is why you need the large pot, ours wasn’t big enough and it took us a long time to clean our stovetop!
- Once all the milk has been added and the mix is a nice light caramel colour leave it on a very low heat or just set to one side.
- Take the mixing bowl and mix the remaining 50g sugar and 85g cornflour.
- Add the yolks to the sugar and cornflour and whisk.
- While you whisk the mixture add a spoonful or two of the warm milk. Once this is well mixed add it all to the original pan.
- Heat the mix over a low heat, whisking all of the time until the mixture slowly thickens and turns into a smooth custard. This can take 10-12mins so prepare your arms.
- *** Top Tip**** Be careful not to let the custard boil as this can mean it's more likely to curdle and look like there’s scrambled egg in it. If curdling starts, remove the mix from the heat straight away and mix vigorously. Once smooth return to a very low heat and continue to stir.
- When you’re happy with the custard pour it into the medium bowl. This can then be set to one side to cool.
- Once the custard has cooled enough to touch, cover with clingfilm making sure the film touches the surface to avoid a skin forming, Many people like a skin on their custard but not really in trifle! Then place in the fridge for 4-6 hours.
2nd Component - Traybake
Making the Caramel Sauce
- Using a large pot on the stove, melt the butter and the sugar until the sugar is fully dissolved.
- Add the tins of condensed milk and stir continuously until it turns a darker colour and thickens. This should take around 15 minutes.
- Set aside to cool while you make the cake.
Making the Cake
- Line the tin with baking paper or grease with butter.
- Turn the oven to 180 degrees Celsius/350 degrees Fahrenheit.
- Put the chopped dates in a bowl and add the boiling water to just cover them. Add in the teaspoon of baking soda, stir through and set aside.
- Cream the butter and sugar together.
- Add the eggs and beat them in one by one.
- Add the vanilla essence.
- Fold in the dates and the flour.
- Put half of the mixture in the bottom of the lined/greased traybake tin.
- Spread over half of the caramel. You can do this by making thick lines criss-crossing the caramel across the cake.
- Pour over the other half of the cake mixture.
- Drizzle about half of the remaining caramel sauce over the cake and use a fork/knife to swirl it around on top of the cake. You don’t need to make a pattern it can be as messy as you like.
- Bake for 30 minutes in the oven. Test with a toothpick or knife in the middle to ensure it’s cooked through.
- Take out the oven and allow to cool. The tray back must be cooled so it will need to be left several hours after it’s finished baking.
- Keep the remaining caramel sauce to one side until you begin building the trifle.
3rd Component - Whipped Cream
- Once your first two components are ready and cooled start working on the cream.
- Place the cream into a large mixing bowl and, with your electric beater, whip the cream until it forms soft peaks. You can then put this to one side.
How to assemble a Sticky Toffee Trifle
We layered our Sticky Toffee Pudding Trifle like this, the sponge gives a solid foundation and the cooled custard is solid enough to hold a second layer.
Top
Cream
Custard
Sponge and Sauce
Custard
Sponge and Sauce
Bottom
Assembly Steps
- Take the cooled traybake, gently place it on a chopping board and cut it in half. We used one half of the traybake per layer. The size of these layers will of course depend on your trifle dish. Ours is 22 x 22 x 22 cm.
- Cut each half of the bake into squares of around 6cm x 6cm.
- Take half of the squares (half the bake) and begin to place them in the bottom of your trifle dish. We started with a square in the middle then built out from there.
- Pack the sponge in as tightly as possible to keep the layer solid once the custard is added. This will mean breaking up some of your squares to make them fit.
- We then added the leftover caramel sauce to the small gaps to both fill the holes but also add a little extra taste. This may need a little reheating if it's become to thick to drizzle in. Think of it as sweet cement!
- Once the bottom layer is nicely packed in, take your custard, again we used half the custard per layer, and spoon it onto the centre of the sponge. Keep spooning it on to form an even layer. The thickness of this will depend on your dish. Our layers were 2-3cm thick. When you finish this the custard should cover the whole sponge layer and be as even as possible.
If you’re only doing one layer of each segment, skip ahead to the cream.
- Take the other half of the traybake and begin the second sponge layer repeating the process as before. Although this does need to be packed tightly like the first layer, place each square on to the custard as gently as possible. If you press too hard the layers won't be defined, this isn’t the end of the world from a taste point of view but it will make it look like a big bowl of custard!
- Once you’re happy with the second sponge layer, begin the second custard layer, exactly the same as before adding each spoonful gently and evenly.
- Take your whipped cream and two spoons, use one spoon to scoop the cream up and the other to scrape it from the spoon on to the trifle.
- Begin in the middle and be very gentle in placing the cream on top to allow the cream to form its own layer and not blend in with the custard.
- Use your spoons to spread the cream evenly across the whole layer, covering the custard completely.
- Finally, scatter a few chopped dates on to the top of the cream as a deliciously chewy garnish.
Notes
You can find our original traybake recipe here
Nutrition Information:
Yield:
15Serving Size:
1Amount Per Serving: Calories: 543Total Fat: 19gSaturated Fat: 11gTrans Fat: 1gUnsaturated Fat: 7gCholesterol: 182mgSodium: 274mgCarbohydrates: 87gFiber: 2gSugar: 73gProtein: 9g
The nutritional data in this recipe is provided by a third party and these values are automatically calculated and offered for guidance only. Their accuracy is not guaranteed.
Other Traditional Scottish Desserts to Try:
- Scottish Trifle: The Easiest Tipsy Laird Recipe
- Easy Clootie Dumpling Recipe
- Simple Microwave Clootie Dumpling Recipe
- Traditional Homemade Scottish Tablet Recipe
- Decadent Scottish Tablet Cheesecake Recipe
- Cranachan: A Traditional Scottish Dessert Recipe
- Scottish Cranachan Cheesecake Recipe
- Simple Caledonian Cream Recipe
Other Simple Cakes to Try:
- Super Simple Golden Syrup Cake Recipe
- Classic Tottenham Cake Recipe
- Old School Cake Recipe – A Nostalgic Classic!
- Classic Jam and Coconut Sponge Cake Recipe
- 4 Ingredient Chocolate Bourbon Biscuit Cake Recipe
- Traditional Dundee Cake Recipe
Pin for later!


Is corn flour the same thing as corn meal?
We found this online ”
Countries outside of the United States, including the United Kingdom, Israel, and Ireland, refer to cornstarch as corn flour and corn flour as cornmeal.” Does this help?
Made this and the taste was wonderful, thanks!
Such a great autumn dessert.
My only concern was that the caramel sauce was really hard and chewy. Great for the traybake but I was hoping for something I could pour more easily as a trifle layer.
Anyway, fantastic.
When I was a little girl my grandmother made sticky cake as shown above. My Mother who thought her Scottish parents were an embarrassment didn’t like much of anything about being a Scott so she made her version with gingerbread and vanilla pudding, but could be coerced into making custard for the topping. This version is my favorite as I found out there were dates in the sticky cake. I find so much amusing about following your great recipes; my mother made several “versions” of Scottish recipes but drew the line at shortbread. She just couldn’t get it right. So it’s become my passion. To get it tender and not tough I mix only to when the butter is just incorporated into the flour and sugar mixture. I also spin the sugar in a blender rather than buy the specialty sugar the recipe calls for. I also have found a great no fail recipe for Scones that my mother wouldn’t tackle.
She was the epitome of the first generation non- foreign born and I think this is what made her so sensitive to anything Scottish. She never realized, however, that my name is Scottish! Seriously! She hated Bagpipes and it follows that I loved the sound they make and when I could I would terrorize her by playing records of pipe’s.
I’ve thought about making real sticky pudding but can’t bring myself to handle the dates as they remind me of my time spent in Texas where the ‘roaches are as big as dates.😂 Have a Happy Christmas and enjoy your Hogmany!
So many lovely stories in one comment, thank you and happy Christmas to you and yours!