
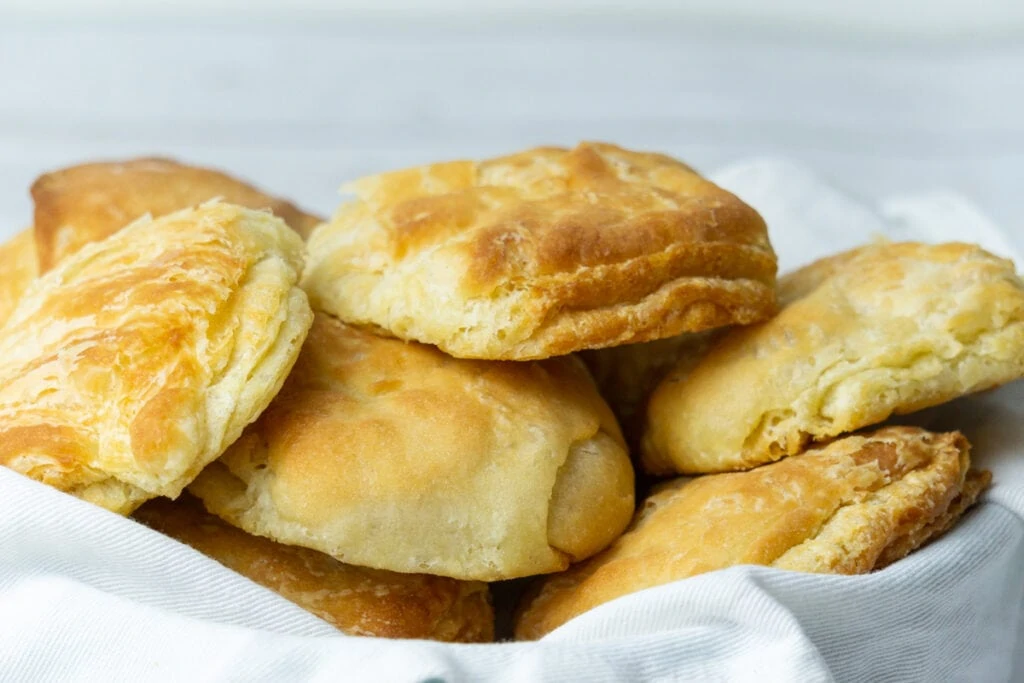
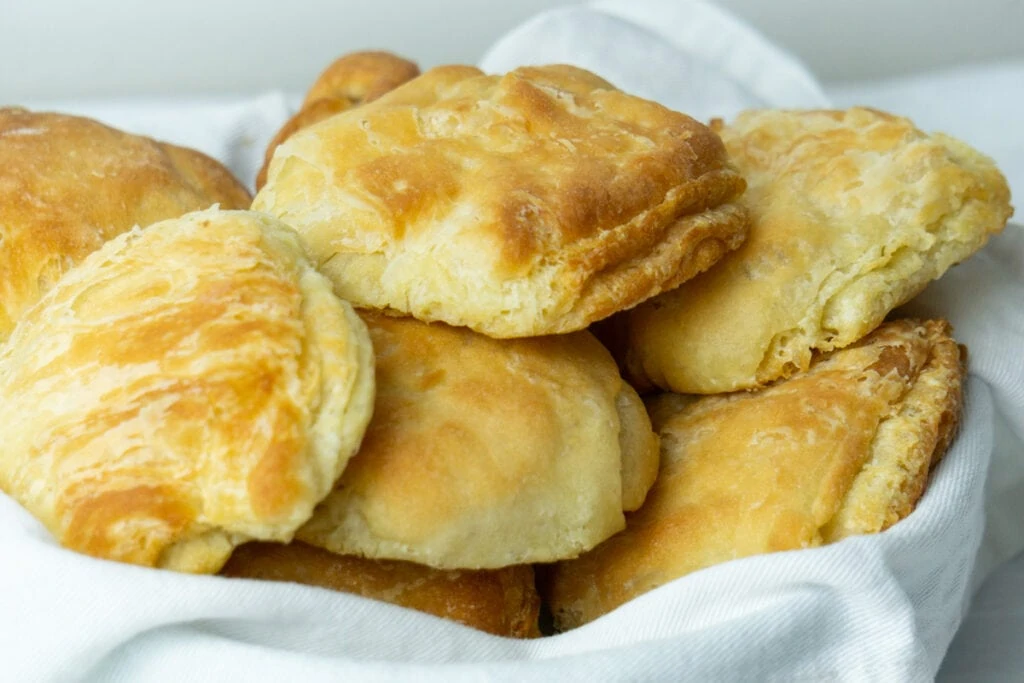
Butteries, also known as Rowies or even Aberdeen rolls, originated in the northeast of Scotland as an alternative bread roll for fishermen to eat while out at sea. A buttery could stand the test of time spent away better than bread and is packed with a high enough fat content to keep the fisherman going too.
What is a Buttery?
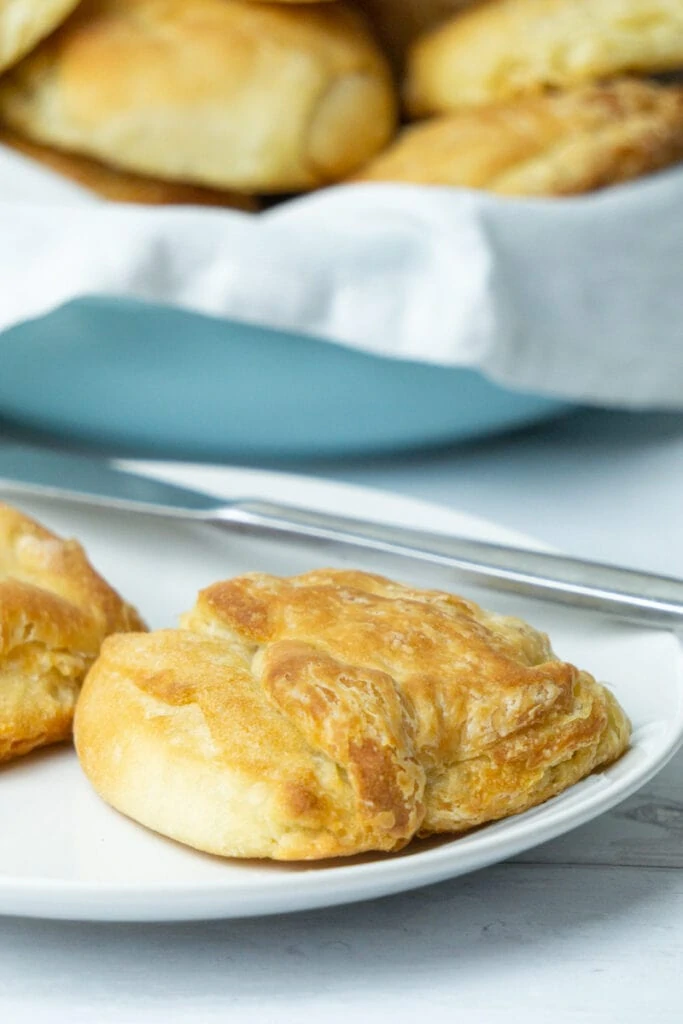
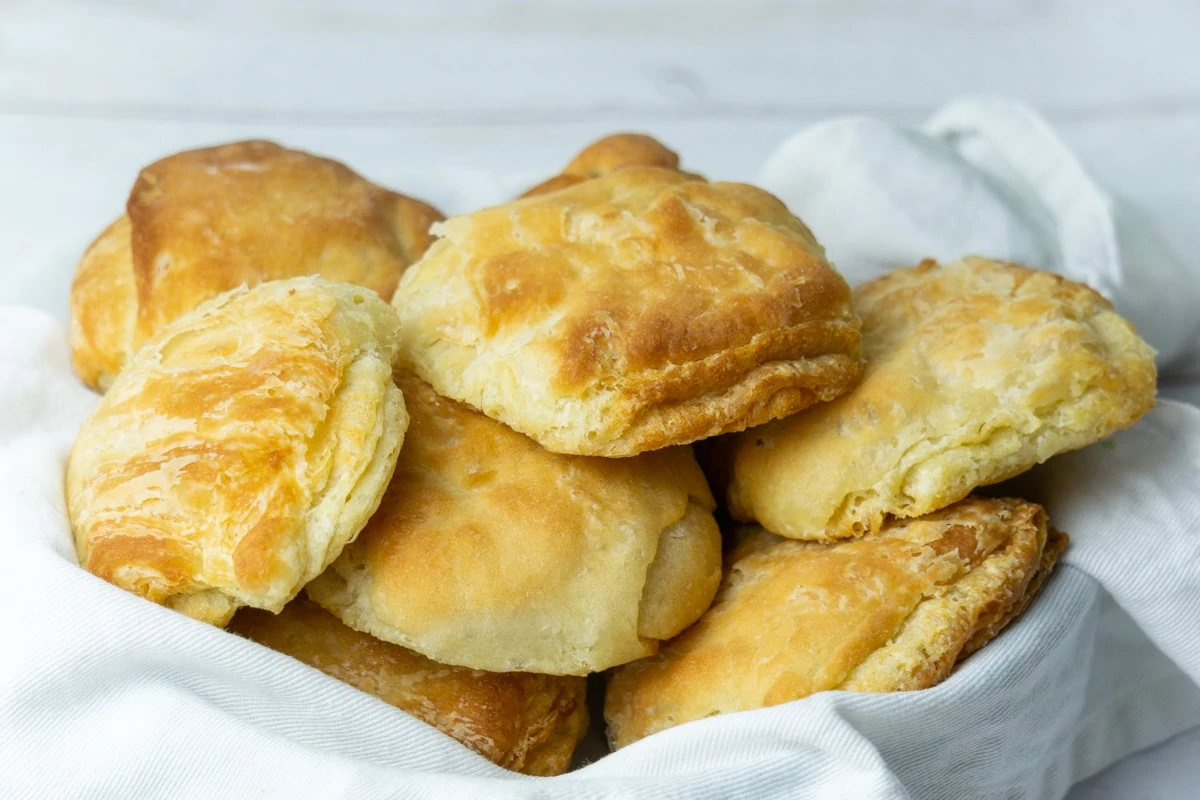
If you’ve never tried a buttery, it’s a bit of a cross between a roll and a croissant. They’re made with layers of pastry and a butter and lard mixture that gives them a flakey texture.
Some say they look a bit like a squashed croissant. It doesn’t sound particularly appealing but they really are delicious!
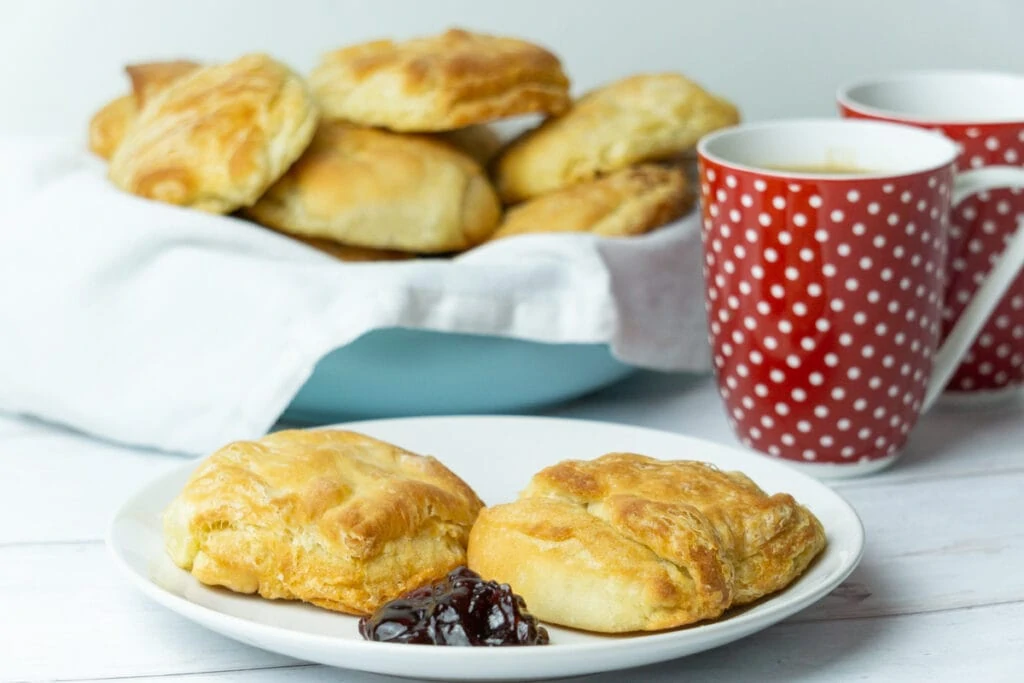
Butteries can be served plain, with jam, or even butter for an extra buttery taste. They aren’t really made to be eaten en masse unless you’re looking to thicken your waistline!
During WWI, butteries were briefly exempt from restrictions on bread sales as they were such an important part of the food for the working classes.
Our search for a butteries recipe had us scouring old cookbooks and more current recipes online.
Everyone seems to have their own idea of the perfect buttery and the best bakery to buy it from, let alone how to make one yourself.
While the intrinsic ingredients of flour, yeast, sugar, salt, butter, and lard don’t change, the amounts can vary wildly. We decided to try a few options and finally came up with the below!
Things you’ll need to make Butteries
- A large and a medium-sized bowl
- Rolling pin
- Baking tray
Ingredients for Butteries
- 500g (4 cups) Strong Bread Flour
- 7g (2 1/4 tsp) dried yeast
- 10g (2/3 tbsp) caster sugar
- 1 tsp of salt
- 200g (1 cup) butter
- 125g (1/2 cup) lard
- 350ml (1 1/2 cups) tepid water
- Extra flour for kneading and rolling
How to make Butteries – Step-by-step method
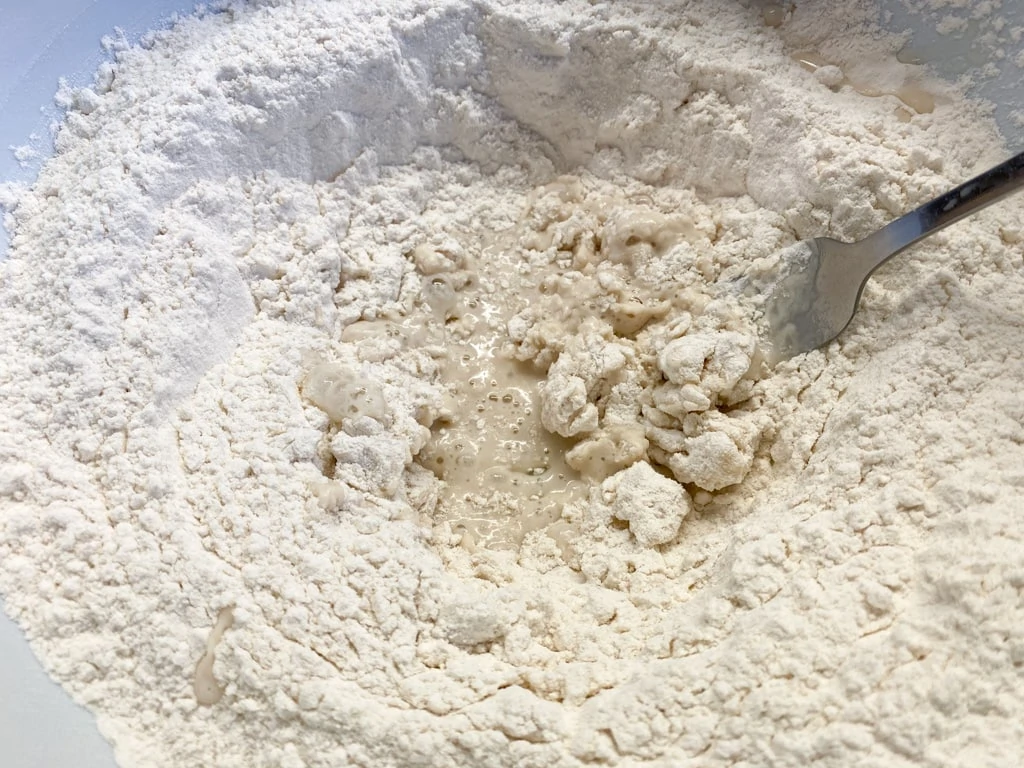
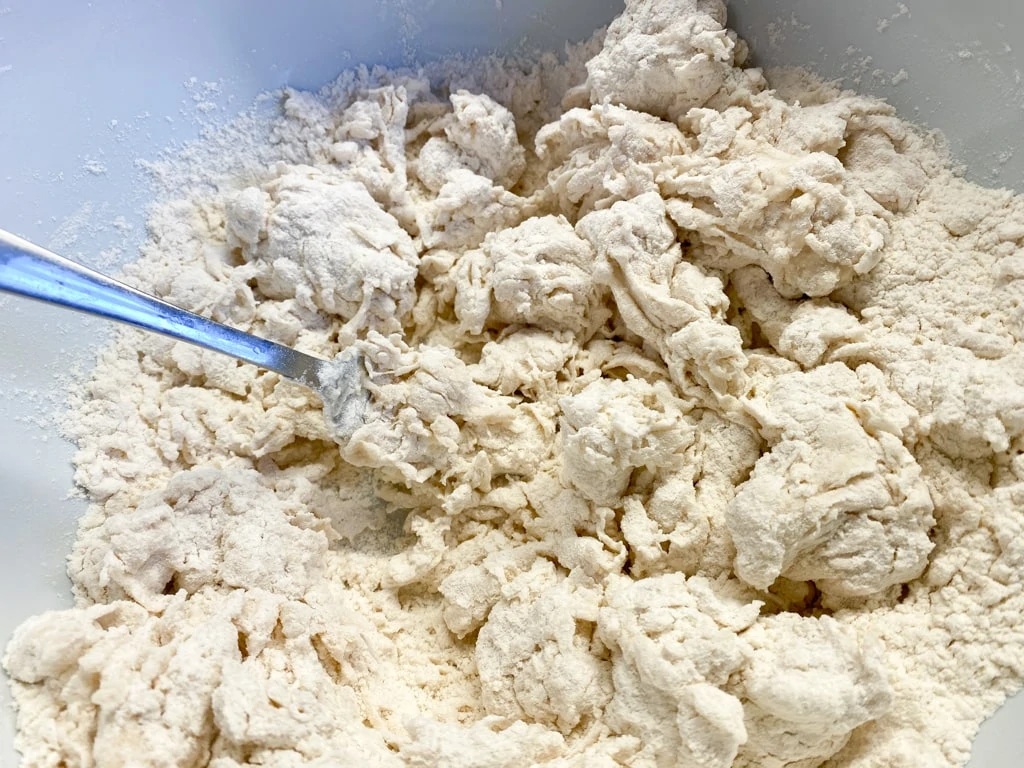
Mix the yeast, sugar, and water, and set aside.
In a large bowl, mix the flour and salt.
Slowly add the liquid and use a fork to bring it together.
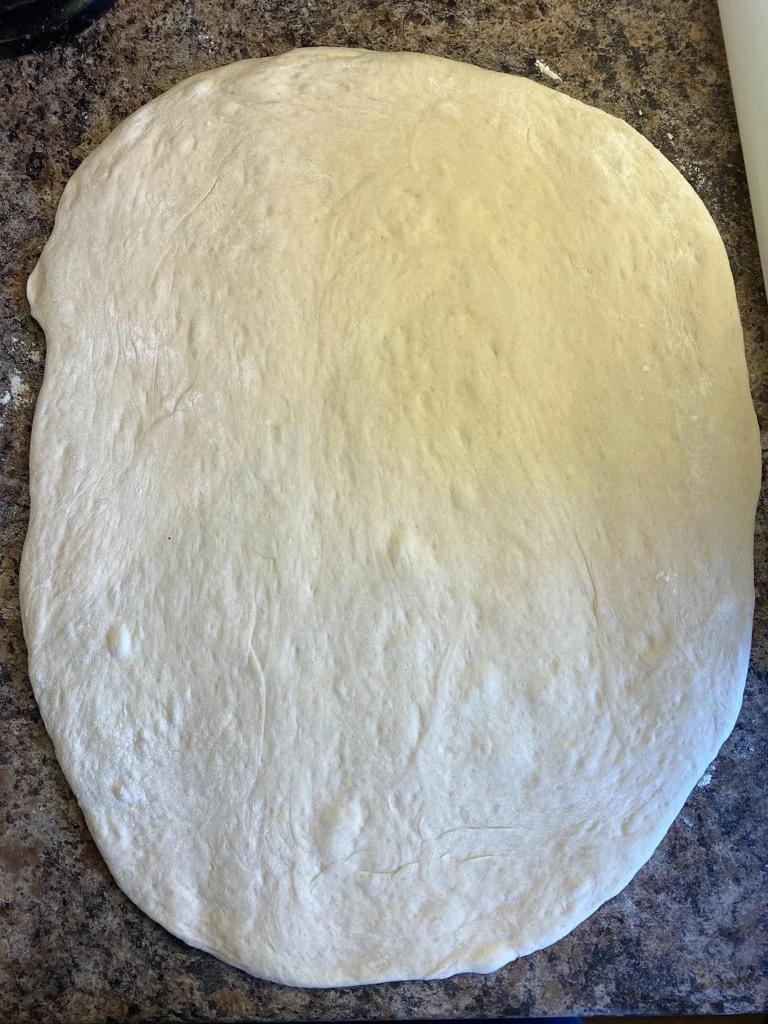
Once combined, turn out onto a floured work surface and knead until it is elastic and smooth. You might need to sprinkle more flour over to knead in if the mixture is too wet and sticking. It depends on the type of flour you’re using!
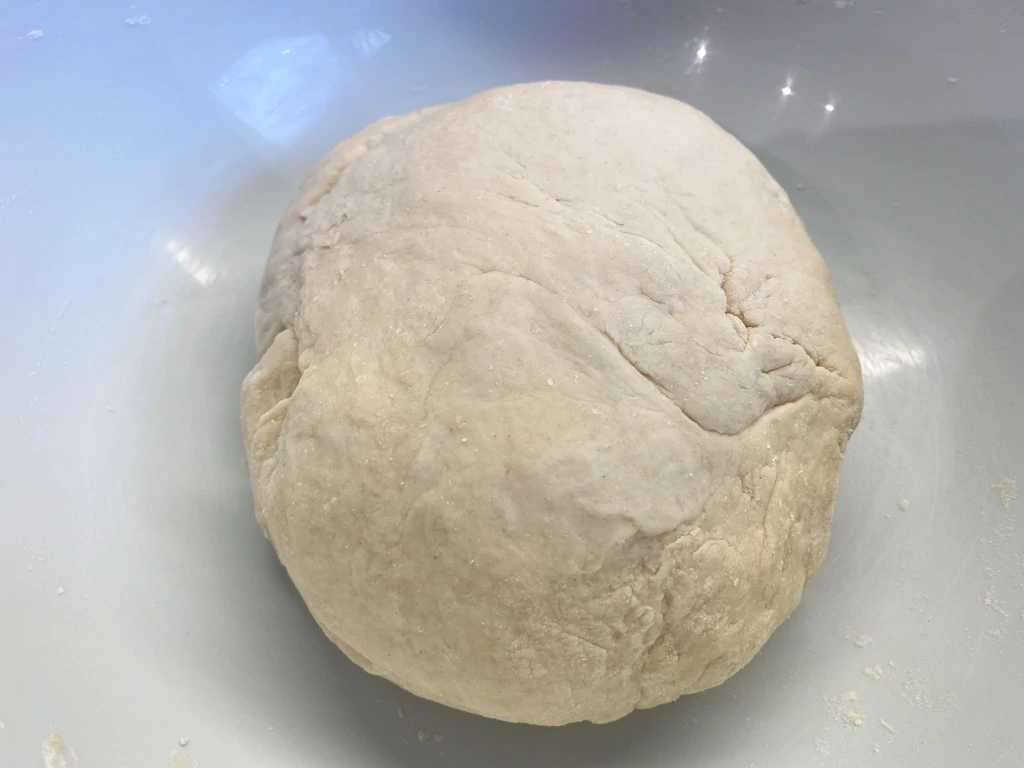
Form into a ball, place into a large bowl, score the top with an X, cover in clingfilm and put in a warm place for about an hour to allow it to expand in size (this is called proving).
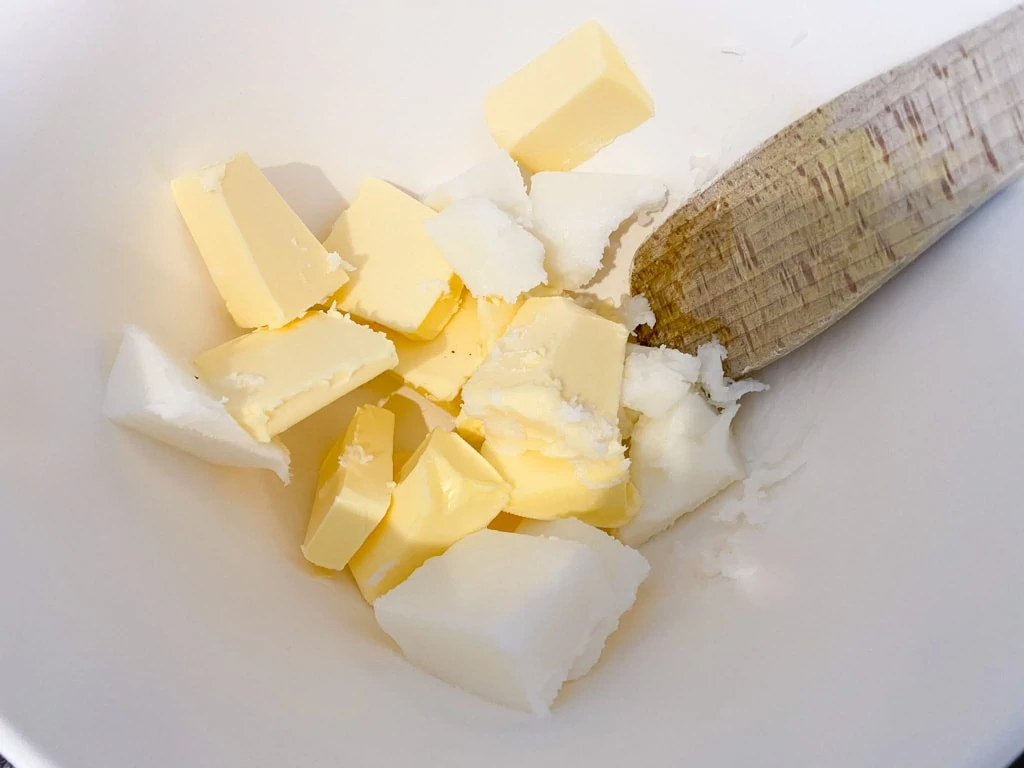
Measure out your butter and lard and cut into small pieces in a bowl to allow it to come to room temperature, if it isn’t already.
After the dough is proved return to a lightly floured work surface and knead very gently before rolling out to a rectangle shape that is about 2/4 of an inch thick. Have the short edge facing you.
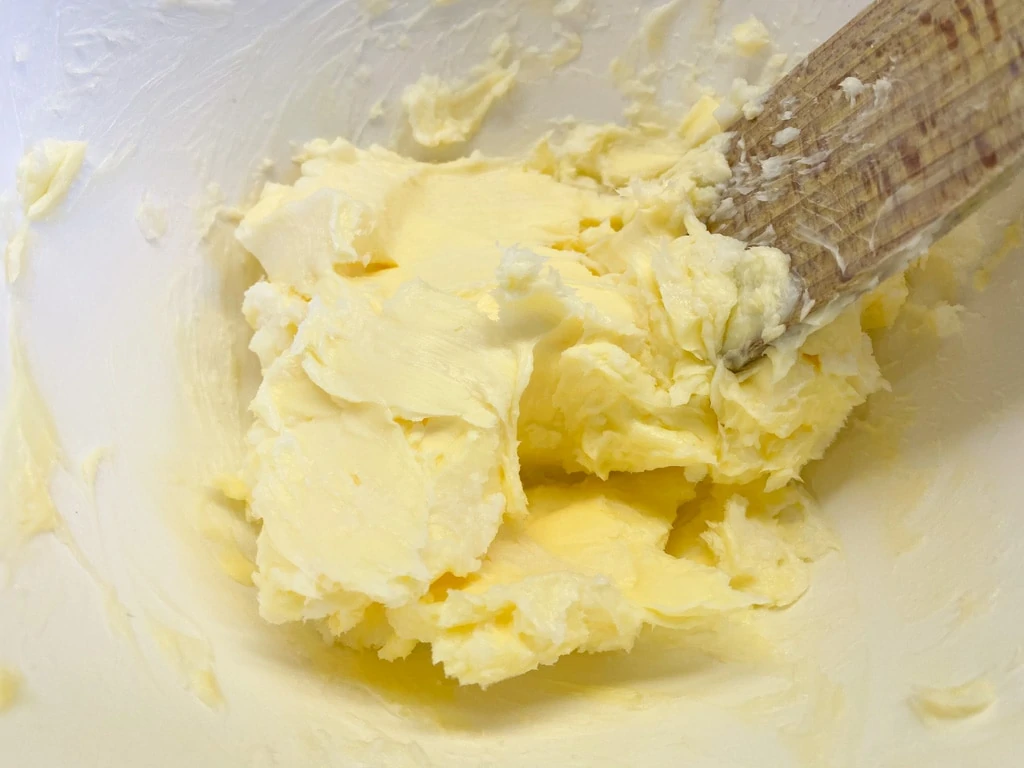
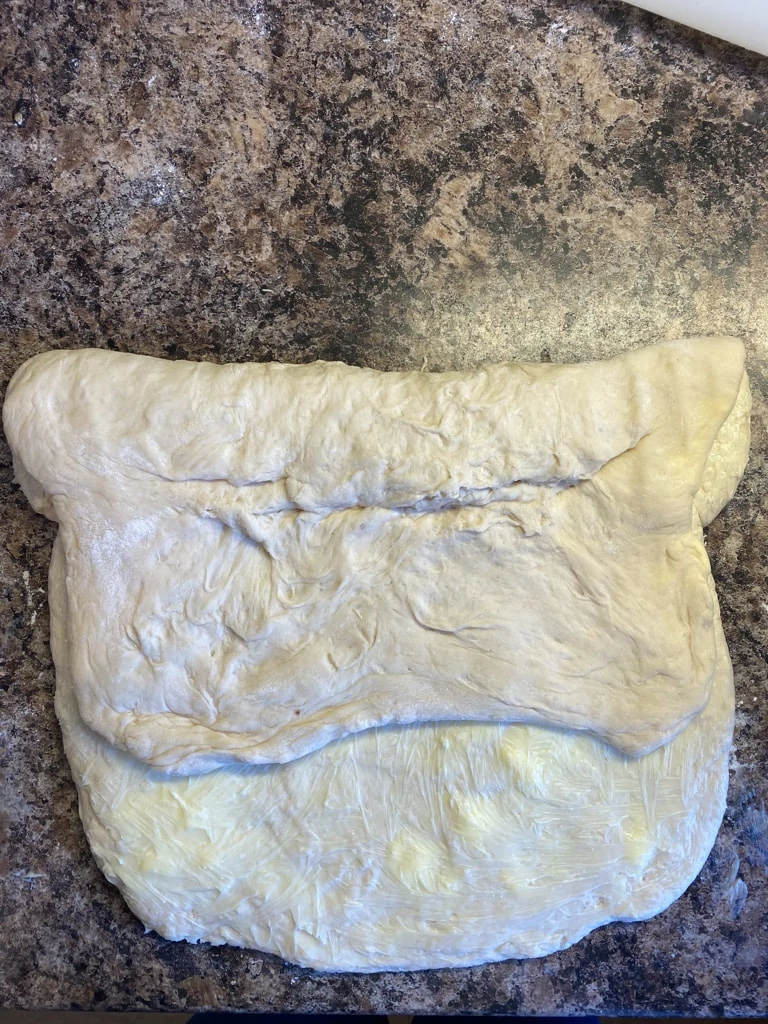
Beat the butter and lard together with a wooden spoon so it’s smooth and roughly split into 3 in the bowl.
Using your hands, smear one third of the butter and lard mixture over the lower two thirds of your rectangle. Fold the top half (without the mixture) over onto the middle third, and then the bottom third up on top of that.

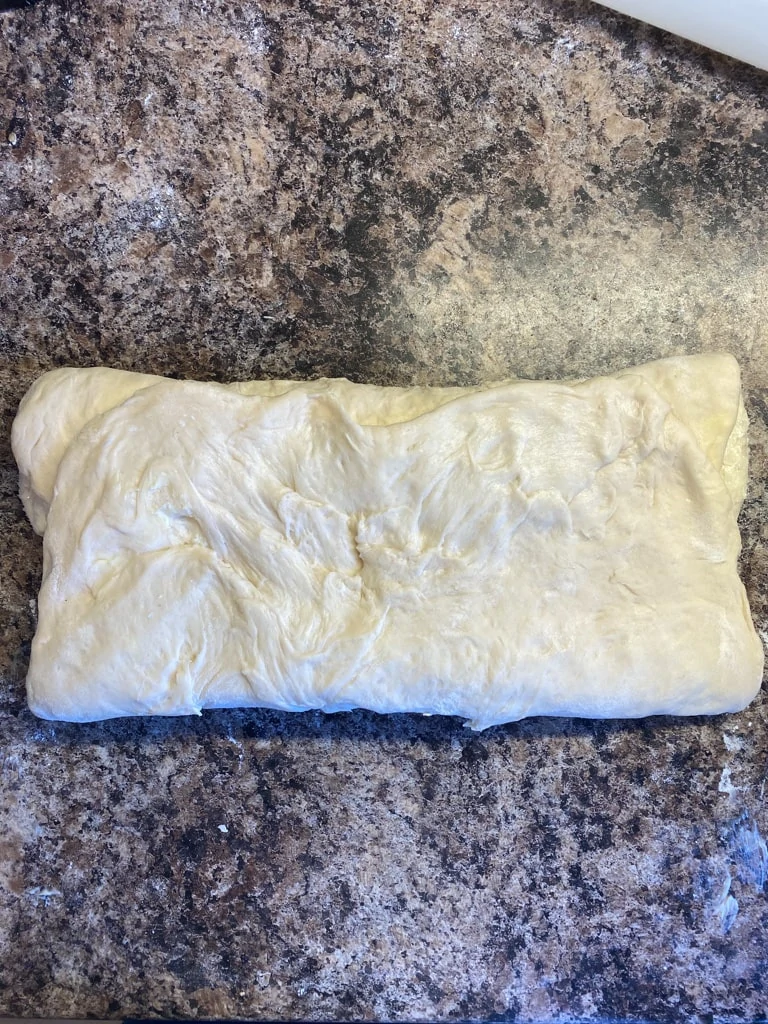
Wait approximately half an hour and repeat the process again, but roll the dough the opposite way to how you have folded it. Wait another half hour and repeat for the last time, turning the dough again to roll the opposite way.
You are basically creating layers in the pastry with the butter/lard mixture in between.
Roll the dough out to about 3/4 of an inch thick and divide into around 15 pieces which you can then gently shape into rounds. Put these on a lightly floured baking tray (or two) and cover with with a large plastic bag or lose cling film, and then allow to prove for a further 30 minutes. You’ll want to space the rounds out to allow them to expand.

Meanwhile preheat the oven to 200C/400F and when the butteries have finished proving place them into the oven for 15-20 minutes. Keep a close eye on them from the 15 minute mark! They should turn golden brown.
Remove from the oven and move to a rack with a plate or paper towels underneath so they’re not sitting in the fat on the tray.
Allow to cool slightly before eating, or save for later!
Serve with jam, or if you dare, even more butter!
How to eat your butteries
We like to eat butteries both when they’re still warm out of the oven and cold the following day. In some ways, the flavour seems to get even better from the next day on!
Jam is my favourite thing to eat with them, whereas Phil prefers them plain.
When we made the batch of butteries for these photos I was unaware that spreading jam (or anything) on the top of the butter is a bit of a faux pas, and any true buttery fan knows you should spread on the flat bottom! Whoops. I have since learned and will also spread on the bottom from now on!

What kind of flour do you use for butteries?
We like to use strong bread flour because we think it gives the butteries a better rise and makes them tastier, but you can also use plain flour as well.
The difference between the two is that bread flour has more protein in it, which gives it more gluten. This can mean more softness, a longer lasting end product, and enhanced flavour.
Can you make butteries without lard?
Sometimes butteries are made with a vegetable fat substitute, or even palm oil, although butteries purists will always say that lard is the best and really only way to make them.
In our research, we found that the majority of recipes used a mixture of butter and lard. We decided to go with this, although you could try a full lard version if you wish!
Conversely, using only butter is also an option but said not to be nearly as tasty, of course.
Other Savoury Scottish Baking Recipes to Try:
- Easy & Authentic Scotch Pie Recipe
- The Perfect Scottish Morning Rolls Recipe
- Easy Haggis Sausage Rolls Recipe
- Simple Scottish Bannocks Recipe
- Forfar Bridie Recipe – Scottish Handheld Meat Pies
- Easy Scottish Oatcakes Recipe
Aberdeen Butteries Recipe (Also Known As Rowies)
Butteries, also known as Rowies or even Aberdeen rolls, originated in the northeast of Scotland as an alternative bread roll for fisherman to eat while out at sea. If you’ve never tried a buttery, it’s a bit of a cross between a roll and a croissant, as they’re made with layers of pastry and a butter and lard mixture that give them a flakey texture. Some say they look a bit like a squashed croissant. It doesn’t sound particularly appealing but they really are delicious!
Ingredients
- 500g (4 cups) Strong Bread Flour
- 7g (2 1/4 tsp) dried yeast
- 10g (2/3 tbsp) caster sugar
- 1 tsp of salt
- 200g (1 cup) butter
- 125g (1/2 cup) lard
- 350ml (1 1/2 cups) tepid water
- Extra flour for kneading and rolling
Instructions
- Mix the yeast, sugar, and water, and set aside.
- In a large bowl mix the flour and salt.
- Slowly add the liquid and use a fork to bring it together.
- Once combined turn out onto a floured work surface and knead until it is elastic and smooth. You might need to sprinkle more flour over to knead in if the mixture is too wet and sticking.
- Form into a ball, place into a large bowl, score the top with an X, cover in clingfilm and put in a warm place for about an hour to allow it to expand in size (this is called proving).
- Measure out your butter and lard and cut into small pieces in a bowl to allow it to come to room temperature if it isn’t already.
- After the dough is proved return to a lightly floured work surface and knead very gently before rolling out to a rectangle shape that is about 2/4 of an inch thick. Have the short edge facing you.
- Beat the butter and lard together with a wooden spoon so it’s smooth and roughly split into 3 in the bowl.
- Using your hands, smear one-third of the butter and lard mixture over the lower two-thirds of your rectangle. Fold the top half (without the mixture) over onto the middle third, and then the bottom third up on top of that.
- Wait approximately half an hour and repeat the process again, but roll the dough the opposite way to how you have folded it.
- Wait another half hour and repeat for the last time, turning the dough again to roll the opposite way. You are basically creating layers in the pastry with the butter/lard mixture in between.
- Roll the dough out to about 3/4 of an inch thick and divide into around 15 pieces which you can then gently shape into rounds. Put these on a lightly floured baking tray (or two) and cover with a large plastic bag or lose cling film, and then allow to prove for a further 30 minutes. You’ll want to space the rounds out to allow them to expand.
- Meanwhile preheat the oven to 200C/400F and when the butteries have finished proving place them into the oven for 15-20 minutes. Keep a close eye on them from the 15-minute mark! They should turn golden brown.
- Remove from the oven and move to a rack with a plate or paper towels underneath so they’re not sitting in the fat on the tray.
- Allow to cool slightly before eating, or save for later! Serve with jam, or if you dare, even more butter!
Notes
Can you make butteries without lard?
Sometimes butteries are made with a vegetable fat substitute, or even palm oil, although butteries purists will always say that lard is the best and really only way to make them.
In our research, we found that the majority of recipes used a mixture of butter and lard. We decided to go with this, although you could try a full lard version if you wish! Conversely, using only butter is also an option but said not to be nearly as tasty, of course.
Nutrition Information:
Yield:
15Serving Size:
1Amount Per Serving: Calories: 326Total Fat: 20gSaturated Fat: 10gTrans Fat: 0gUnsaturated Fat: 8gCholesterol: 37mgSodium: 243mgCarbohydrates: 31gFiber: 1gSugar: 1gProtein: 5g
Pin for later!
Fried eggs are the very best thing with a couple of butteries for a fantastic breakfast.
Sounds pretty good to us!
Hi, my husband is from Aberdeen and he loves his Rowies. Thank you.🙂
Excellent! Hope he likes the recipe 😀
My family is from Aberdeen and I haven’t hear of a recipe like this, the rowies I have seen are if a more hearty variety and not so flakey. From my understanding rowies were meant to be a meal supplement that you could basically stick in your pocket for when needed but I am interested in trying this and sharing them with the family.
The butteries recipe is a bit generous with the butter and lard. WAY TOO MUCH! You could halve it and get a much better result
Interesting, that’s not what we’ve found but is very much the joy of cooking you get to make it just how you like it. Thanks for the comment. – Phil
Would I be able to halve the recipe? 15 is way too many for the two of us!
You can, and we see you’ve made them already, so we’re very pleased you gave it a go!
Made my first batch yesterday and they’re perfect! The only thing I did differently was to do what my mum used to do,cut into squares and fold the corners into the middle and then turn over so the folds are underneath. Then just before they go in the oven gently press with your fingers to get the misshapen look.
Great tip, thank you!
Thank you very much for a very good recipe. Saw these as a featured segment on GBBO. Came out great although a bit too buttery for my taste. May 1/2 the butter next time leaving the lard as is. Made a mess in the oven even with my parchment paper folded up at the edges to contain the leaking butter. And why write “1/2 inch” as “2/4 inch”? Although technically correct, it defies convention. Anyway, thanks again for sharing a recipe I’m sure to come back to time and again.
I’m from Kent – 60 odd years ago friends of my grandmother retired to Findhorn (way before it became an alternative Mecca) and we used to visit them for a family holiday once a year – loved the place. Stayed in a great extended guesthouse called The Sea Chalet, where they always had these amazing rolls for breakfast – never knew what they were – but have remembered them ever since and looked for recipes occasionally over the years with no luck. Listening to The Kitchen Cabinet today discovered the name ‘butteries’. Yay! Can’t wait to try this recipe! Thank you!
What a story! Thank you so much for telling us. We hope the recipe lives up to your wonderful memories. Do let us know how you get on.
I love butteries. Even the reduced salt versions that we get nowadays. Charmers of Bucksburn was always the best bakery. Sadly no more I gather as they have shut up shop.
FYI – I noticed that you have buttered the bottom though rather than the top (the flat bit). I have seen that before.
Thanks! I lived in Aberdeen for a couple of years and looooved my butteries! Been back in Australia for a few years and sadly have failed in every previous attempt to make them. Today I finally succeeded with this recipe! Was so lovely to share a favorite with my family here
That’s great, thanks for letting us know!
Awesome recipe. I converted for my thermomix and the texture is amazing. Living in Australia I can only remember Butteries from my holidays home to Aberdeen. The best thanks.
That’s wonderful to hear thanks!!
Morning; I followed this recipe to the letter but substituted the flour for GF bread flour, they came out the over looking good, didn’t brown too much and they tasted good BUT they were hard as a brick so we couldn’t eat them. Any advice as my wife is GF.
Hi Kenny, unfortunately we’ve never tried them with GF flour so we’re not sure! A little research tells us this is often a problem when making bread-like recipes with it. A quick bit of research suggests adding more leavening agent (like baking powder) or a little more liquid than the recipe specifies as well. You might need to experiment with these things a little and see if it helps!
Hi Kenny, if you’re doing any sort of baking with GF flour, you can use xantham gum as a gluten substitute. It fulfills the same “glue” function as gluten. So that might help.
I am an Aberdonian . Made these in Canada, was liked by the locals. Can I make them with whole-wheat flour?
We’ve not tried so unsure how they would turn out. They would probably turn out a lot more dense. We’d recommend going 50/50 with regular flour for that reason, if you want to give it a go.
An Aberdonian here that has lived in Australia for 50 odd years and has never attempted to make my favourite…the rowie! Now I’ve found this recipe I’ll give it a go. My brother who lives in Aberdeen always said the best rowies came from Aitken’s bakery and I always enjoyed them on my trips home. Thanks for the recipe and fingers crossed.
We hope it works for you!
Does one leave the dough at room temperature in between the rolling and folding? It seems as though similar breads or pastries would rest in the fridge. (e.g. croissants, puff pastry)
It very much depends on how warm your house is, where we are we haven’t had to use the fridge but you don’t want the butter to melt so if it’s hot then use the fridge.
Hi
Was a student in Aberdeen a long time ago and these were the go to real breakfast of champions. My partner is from Aberdeen but we are now in Aotearoa. Just realised its 20yrs almost to the say we were back and last filled up on these. So have now got a batch proving. I vegefied with vegetable shortening instead of proper lard so hope they still taste authentic enough to memory!
Thanks for sharing recipe.
I wanted to try these, ‘cos I’m currently reading a series of books by Stuart McBride set in Aberdeen and ‘rowies’ seem to be a staple diet of his policemen!
They turned out beautifully flaky and tasty, but I have to agree with some of the other comments about the amount of butter – my baking trays were so full of melted butter that I had to pour some off mid bake. With butter being so expensive here in Australia at the moment, I’m going to be a bit less generous next time. But great recipe – thank you!
Oh my. I’ve just made these and they are absolutely yummy. I decided to cut down the butter content but think I may add more next time and used a six seeded kibbled malt flour and they came out superb. Thank you
It’s amazing how much the butter affects the taste, your additions sound like a great idea! Thanks for sharing.
Best butteries I’ve ever eaten! They are puffy, moisture, flaky, layered. I used exact amounts from the recipe and they weren’t soggy. Easy and well desribed recipe. Saved to my cookbook!
Thank you very much, high praise indeed!
I like a Rowie with my mince as a change from dough-balls slip them just before serving lovely.
Ken Christie, born in Aberdeen, living in Sydney.
Born and brought up in Bucksburn, I remember we had rowies from Charmers of Bucksburn on Auchmill Rd. Years later, I married an Australian and moved to Sydney.
My wife, Elizabeth, was a gourmet cook – I’m definitely NOT. When we holidayed back in Aberdeen, we always had rowies. She asked the baker for the recipe. He said all bakers in Aberdeen sign a pledge never to let the recipe leave the Silver City. She said we lived in Sydney and, really we had to plans to retail them.
Reluctantly, he jotted down the recipe and gave it to her. Years later, Elizabeth tried it, but it didn’t work out. She lost her battle with cancer last year. I have been sorting out all her cookbooks. I came across the jotted down recipe from the baker, and the result. I thought I might find something on the web. I found this site.
I tried this recipe, but neither Woolies nor Coles had lard. On their respective websites , it said out of stock. So I added the extra 125g in butter. Eventually, when I pulled the results out of the oven and they had cooled down, I chose the smallest one and took a bite.
OMG, it was grand. You know, when I was a teenager and went dancing in Aberdeen’s Palace Ballroom, I always missed the last bus home, so had to walk. I was told about the baker in Mount Street, just up Rosemount Viaduct. Knock on the back window and buy your rowies at 2am. I did that and gorged myself with a dozen rowies walking home. If you know the area, you’ll know that Bucksburn is a fair walk from Aberdeen.
This taste took me right back to that walk home… unbelievable!
Making another batch next week, but this time, substituting the lard for my wife’s home made Duck Fat that I found in the fridge. I’m taking the batch to my bestie of 56 years for Burn’s Supper Night next Sunday. He can’t wait to have rowies again, either.
I’ll post the results.
Ken.